When you configure this integration, the Vantage service principal is granted billing account reader permissions. The service principal does not have permissions—nor will it ever attempt—to make any changes to your infrastructure.
You must have a Vantage Organization Owner or Integration Owner role to add or remove this integration. See the Role-Based Access Control documentation for details.
Create a new application registration
Generate a client secret
Obtain your billing account ID
Assign the billing account reader role to the service principal
Add app registration credentials to the Vantage console
Grant Reader access for Active Resources and recommendations
Step 1 - Create a New Application Registration
1
From the main page of the Azure portal, search for and navigate to Microsoft Entra ID.
2
In the left navigation, under Manage, select App registrations.
3
Click + New registration.

Click to view example image
Click to view example image
4
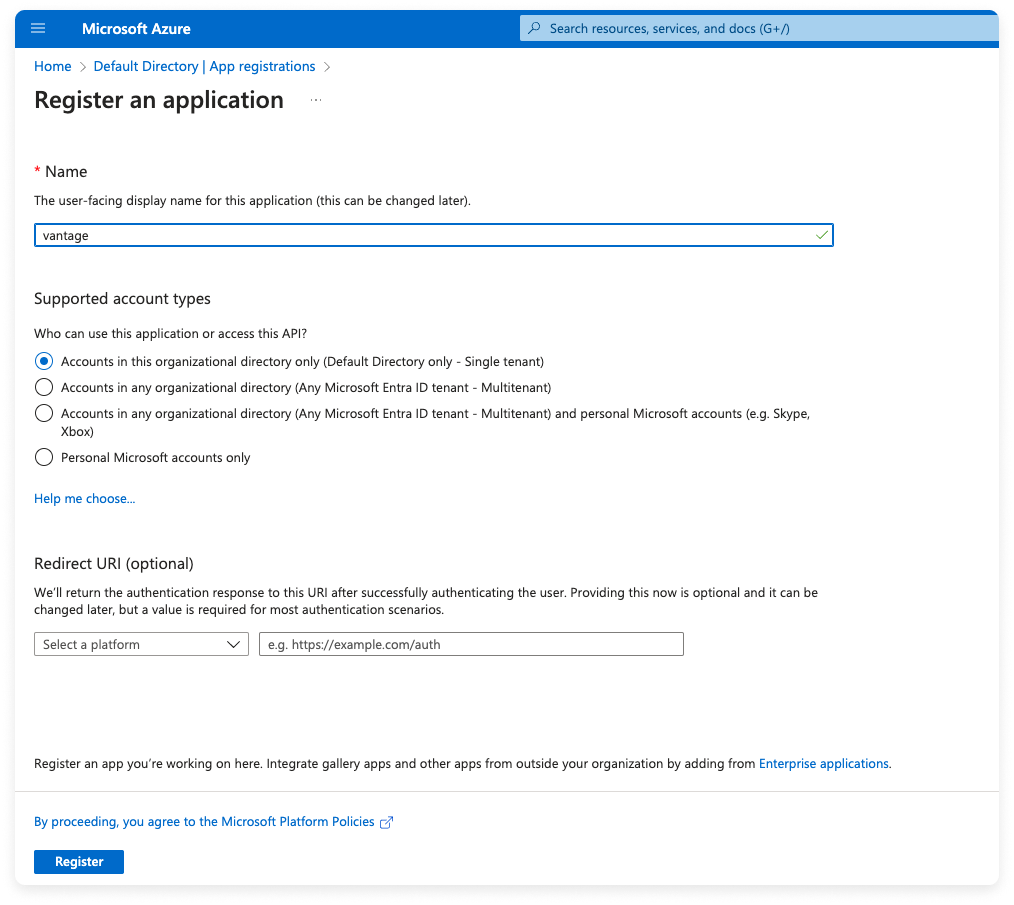
The Register an application screen is displayed. For Name, enter vantage.
5
Leave all other settings as their defaults and click Register.
Click to view example image
Click to view example image
6
The app details are displayed. Record the Application (client) ID and Directory (tenant) ID to use later.

Click to view example image
Click to view example image
Step 2 - Generate a Client Secret
1
On the same page, next to the Client credentials field, click Add a certificate or secret. (You can also access the Certificates and secrets screen from the left navigation menu.)
2
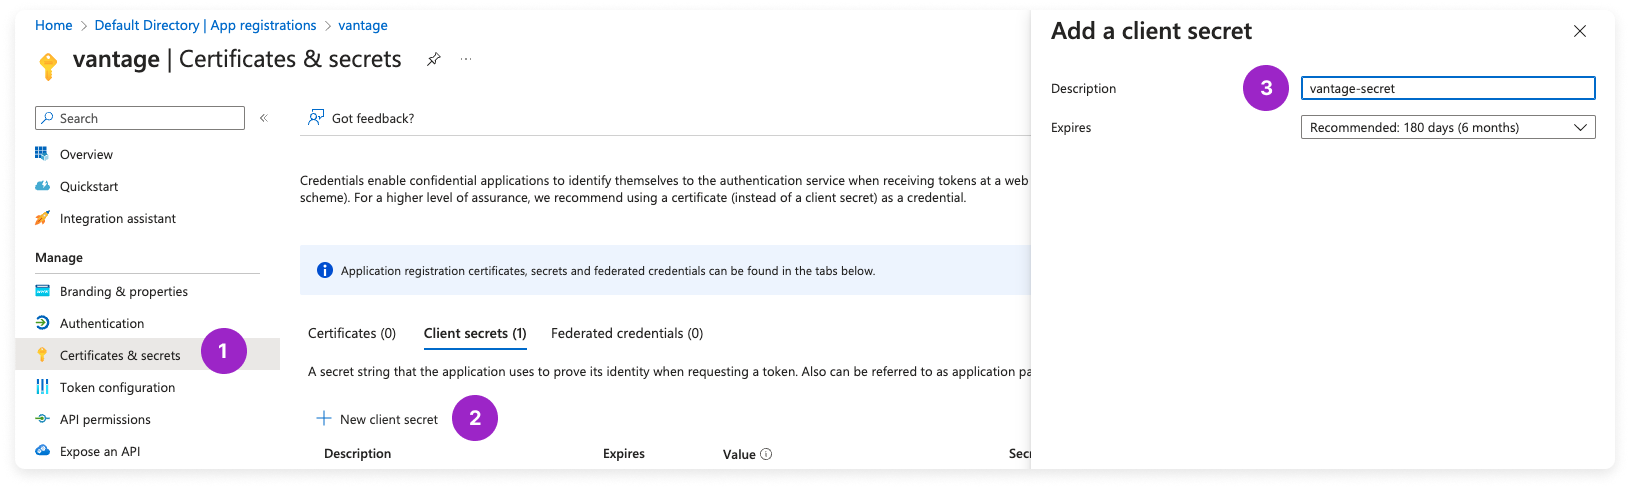
Click + New client secret.
3
The Add a client secret pane is displayed. For Description, enter a description, such as vantage-secret.
Click to view example image
Click to view example image
4
For Expires, select an expiration option for the secret.
5
Click Add.
6
The newly created secret is displayed. Copy the secret’s Value to add to the Vantage console later. This value will be displayed only one time.
Step 3 - Obtain Your Billing Account ID
1
Navigate to Cost Management + Billing.
2
On the left menu, click Billing scopes and select your MCA Billing Account from the list.
3
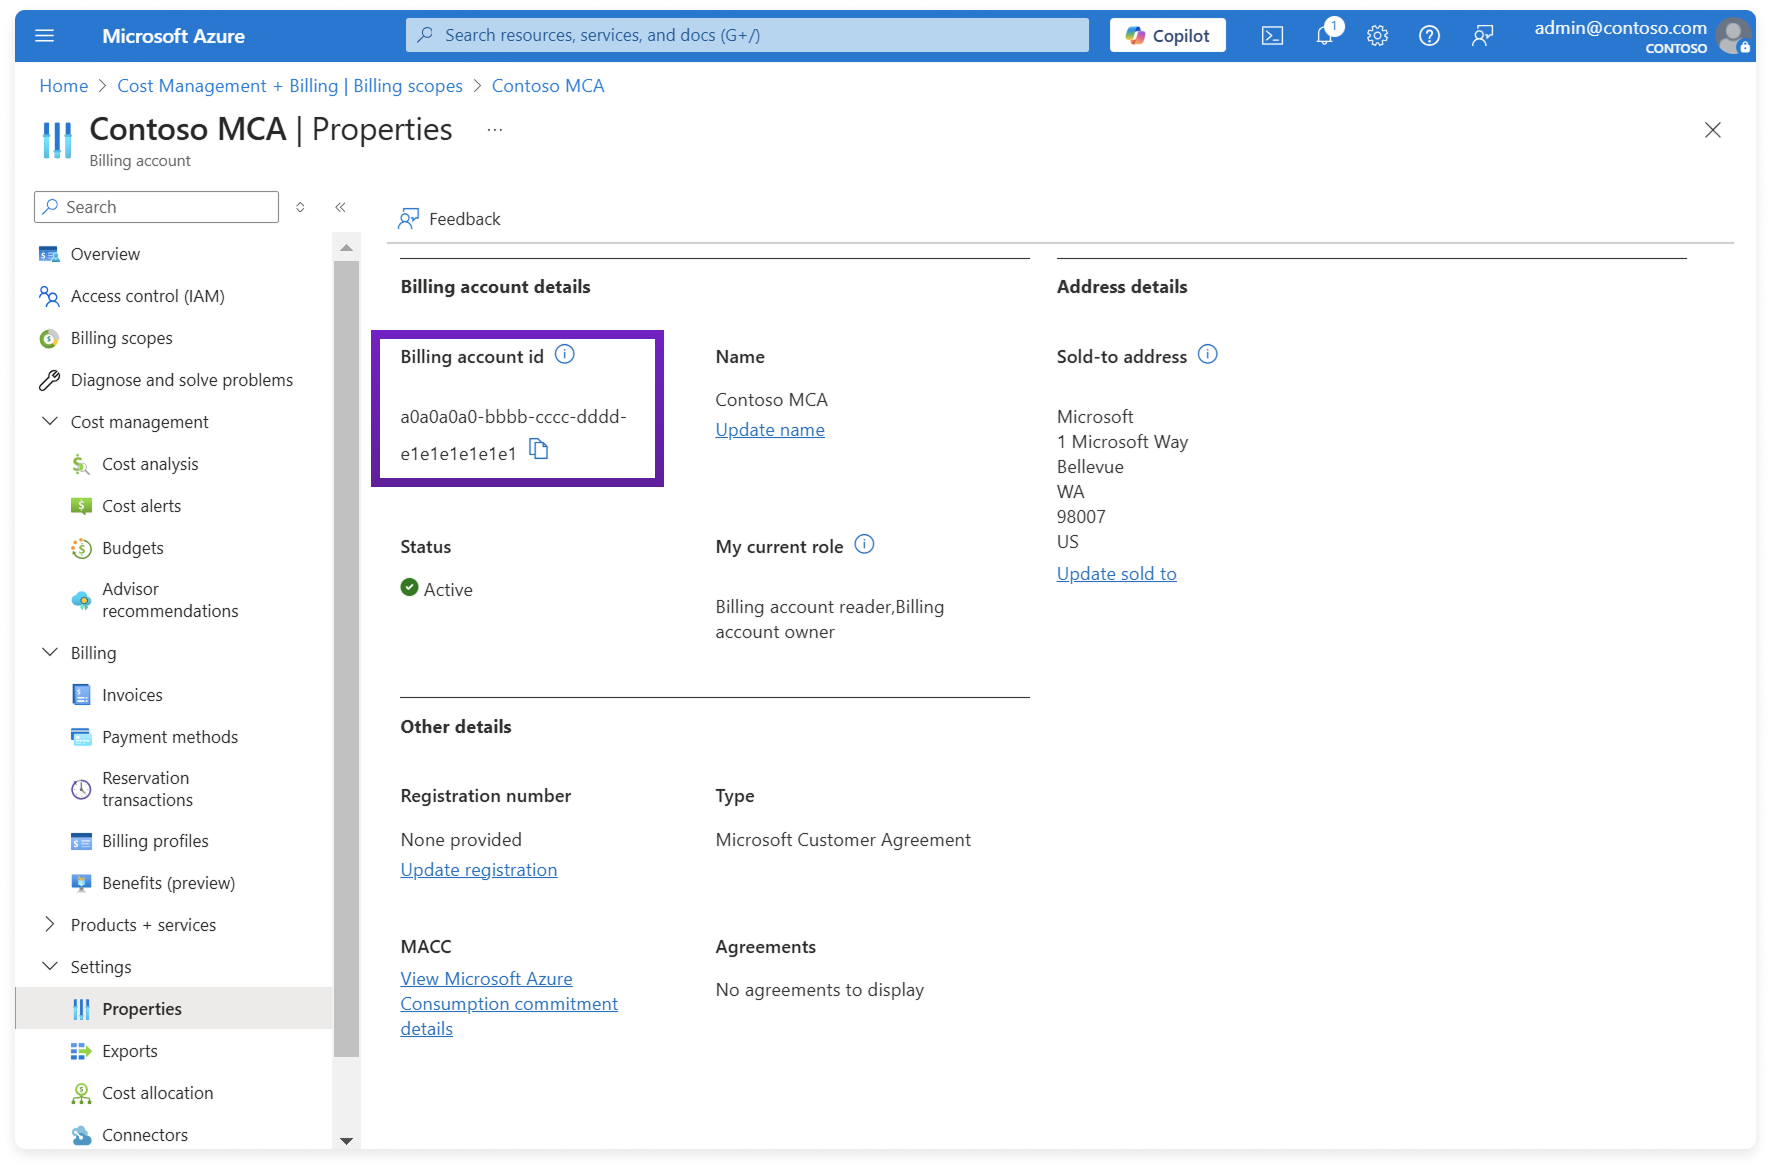
On the left menu, click Settings > Properties.
4
Copy your Billing account id to add to the Vantage console later.
 Source: Microsoft
Click to view example image
Click to view example image
Source: MicrosoftStep 4 - Assign the Billing Account Reader Role to the Service Principal
1
From the left menu, select Access Control (IAM).
2
At the top, click Add.
3
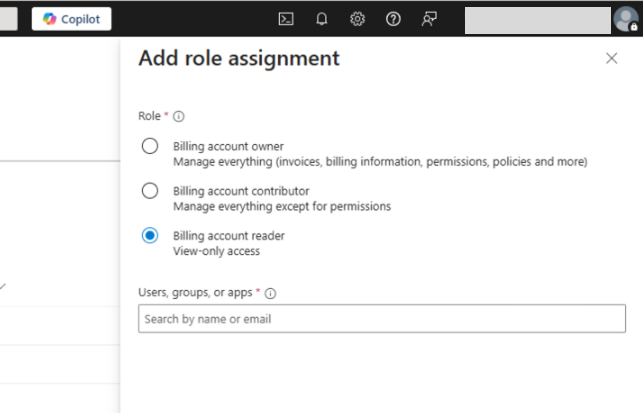
On the right Add role assignment pane, select Billing account reader.
Click to view example image
Click to view example image
4
Under Users, groups, or apps, search for and select the vantage service principal that was generated when you created the app registration in step 1.
5
Click Add.
Step 5 - Add App Registration Credentials to Vantage
1
Navigate to the Integrations page in the Vantage console, and add an Azure integration.
2
On the Azure integration page, click Add Credentials.
3
Add the following credentials:
- For Azure AD Tenant ID, add the Directory (tenant) ID you obtained in step 1.
- For Service Principal App ID, add the Application (client) ID you obtained in step 1.
- For Service Principal Password, add the client secret you obtained in step 2.
- For Billing Account Id, add the Billing Account Id you obtained in step 3.
4
Click Connect Account.
Step 6 - Grant Reader Access for Active Resources and Recommendations
Steps 1-5 grant billing account reader access, which is sufficient for importing Azure cost data into Cost Reports. Billing account reader does not grant access to your resource inventory, so this step is required to use Active Resources and recommendations.
After granting the Reader role:
- Wait for the next daily sync. Resources can take up to ~24 hours to appear. See the Active Resources documentation for details.
- Confirm the Azure integration is assigned to the workspace you’re viewing, as resources only appear in workspaces where the integration is enabled.