Connect Your MongoDB Atlas Account
Prerequisites
- To create an API key for Vantage to ingest costs, you must be an Organization Owner inside the MongoDB Atlas console.
- To add the API key to relevant projects to use Active Resource inventories inside Vantage, you must be a Project Owner in the MongoDB Atlas console.
For more information on user roles in MongoDB Atlas, see the MongoDB Atlas documentation.
Step 1 - Review the Vantage Integration Page
Navigate to the MongoDB Atlas Settings page in the Vantage console. Then, click Add API Key. You will need to add your Organization ID, Public API key, and Private API key. Detailed steps for obtaining each of these items are provided below. Leave this tab open so you can go back and populate these fields as you obtain each value.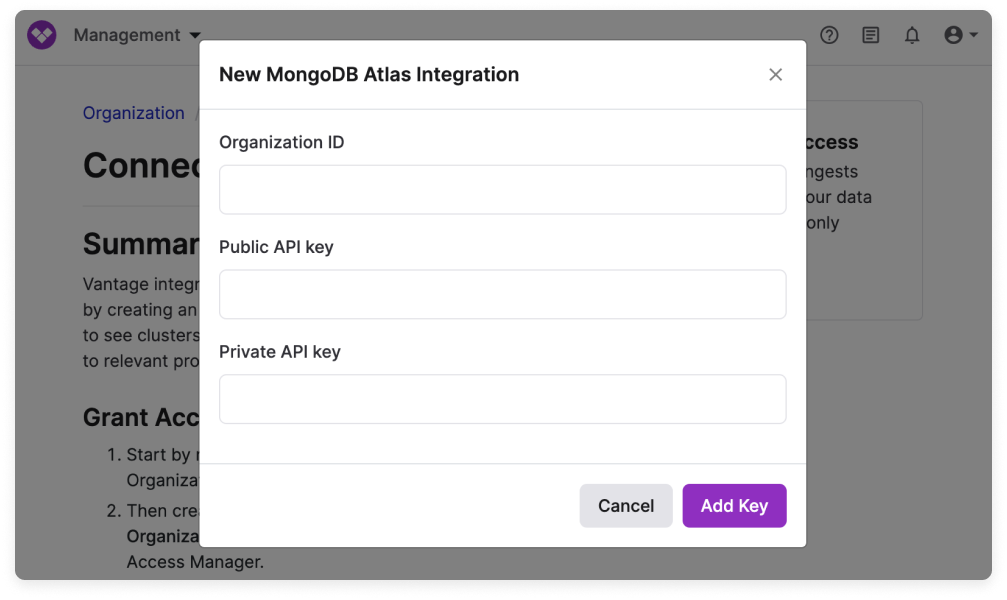
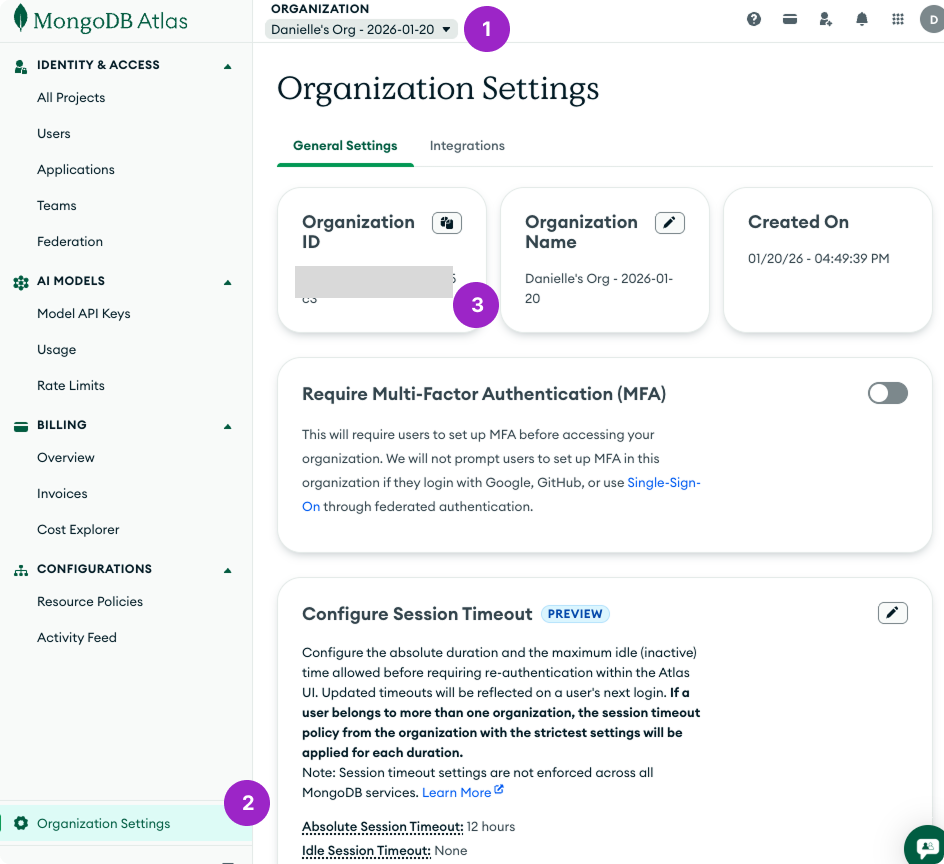
Step 2 - Obtain Organization ID
In a new browser tab, navigate to the MongoDB Atlas console.
Step 3 - Create an Organization API Key
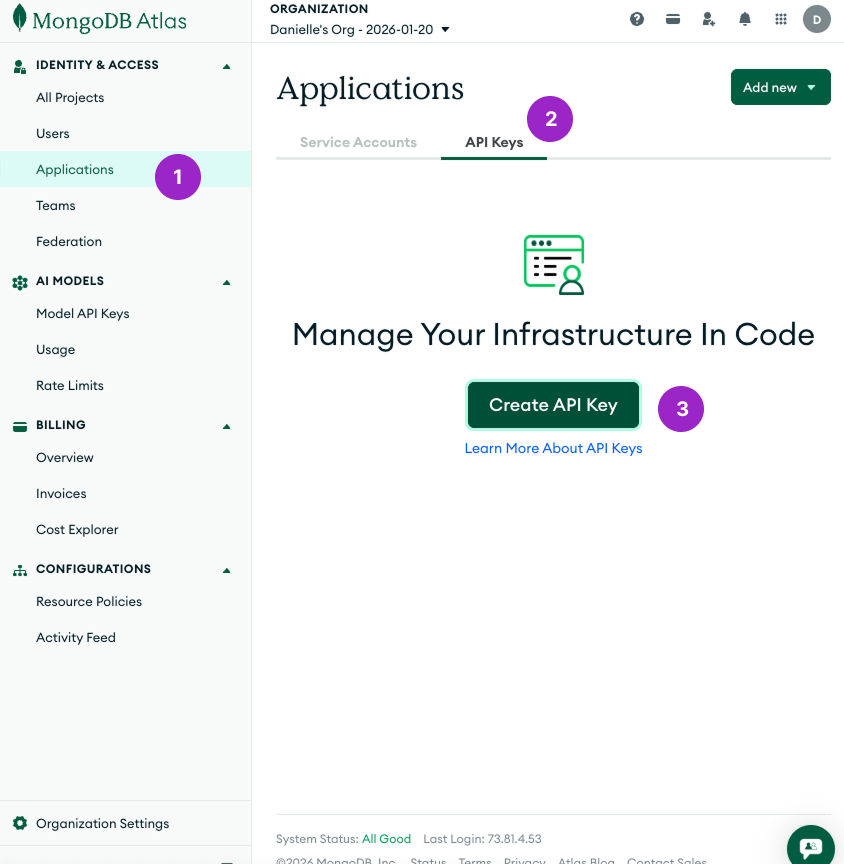
Next, you’ll create an API key and grant it read-only permissions to your invoices and, optionally, to cluster-level cost data.Select the API Keys tab, then click Create API Key (or click Add new > API Key at the top if you already have created one).
Click to view example image
Click to view example image

On the Create API Key screen, configure the following details:
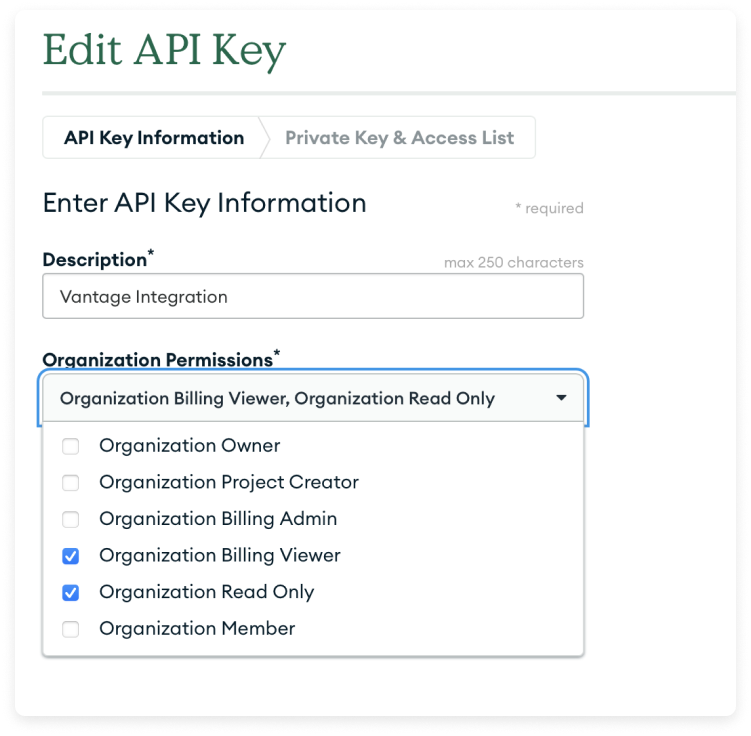
- For Description, enter a name, like Vantage Integration.
- For Organization Permissions, select Organization Billing Viewer and Organization Read Only.
Click to view example image
Click to view example image

Click Next. Your public and private keys are displayed. Copy the keys and paste them into the Public API key and Private API key fields in Vantage.
If your organization requires an IP Access List for access control, you will need to add each of the following IPs to the API Access List section. Add each IP address individually: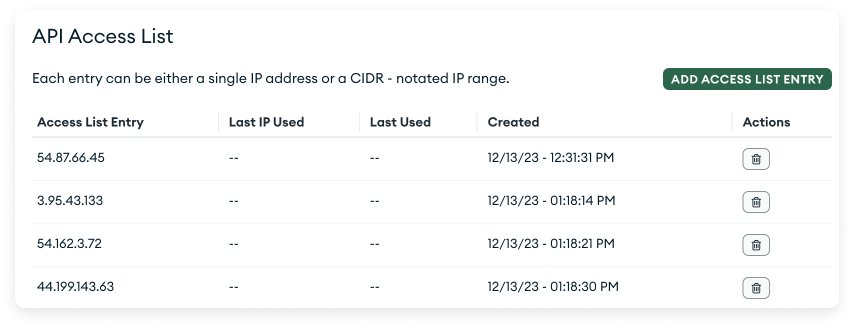

Step 4 - Grant Project Access for Active Resources
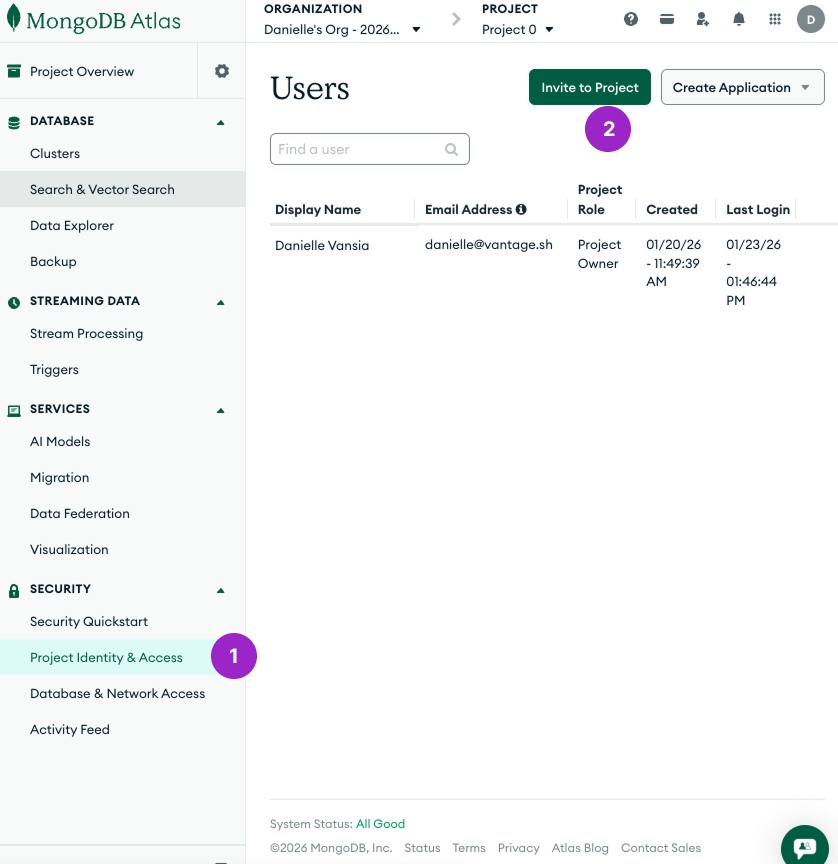
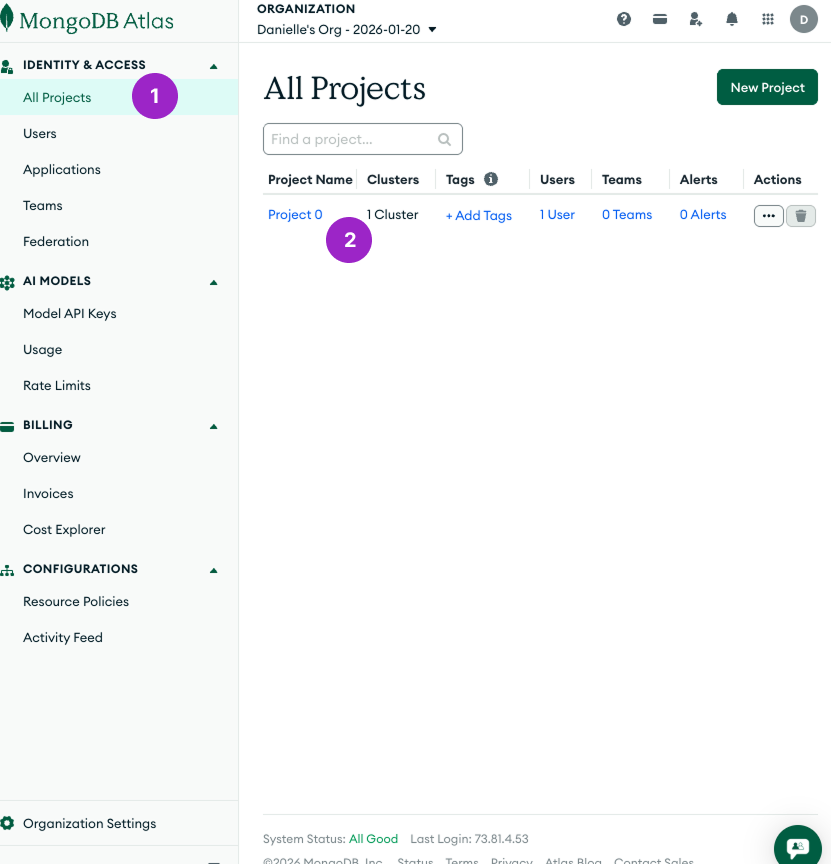
On the left navigation menu, under Identity & Access, select All Projects to see your list of Atlas projects. Select your project from the list.
Click to view example image
Click to view example image

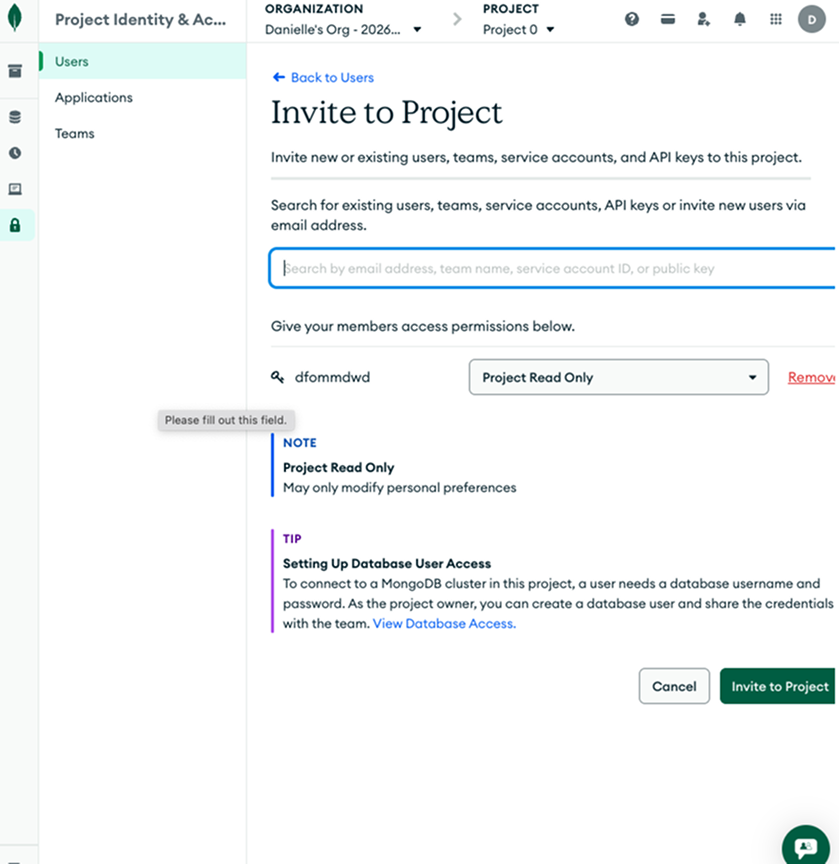
Grant the Vantage Integration API key Project Read Only access. Then, click Invite to Project. Repeat this process for any other projects where you want to see resource-level costs.
Click to view example image
Click to view example image

Next Steps - Manage Workspace Access
Once the import is complete and the integration status changes to Stable, you can select which workspaces this integration is associated with. See the Workspaces documentation for information.Data Refresh
See the provider data refresh documentation for information on when data for each provider refreshes in Vantage.MongoDB Atlas Reporting Dimensions
On MongoDB Atlas Cost Reports, you can filter across several dimensions:- Project (project ID)
- Category (Atlas Cluster - Atlas Instance M2)
- Tag (includes MongoDB tags and virtual tags created in Vantage for this provider)
- Resource (service resource ID)
- Charge Type (e.g., Usage)
- Organization (organization name)
- Service (e.g., REALM)
