When to Use Custom Providers
Custom Providers are designed for cost data that Vantage cannot automatically ingest from a billing API. Common use cases include:- Unsupported SaaS providers — Import costs from any vendor not listed on the Supported Providers page.
- Internal or on-premises costs — Track data center, licensing, or infrastructure costs alongside your cloud spend.
- Supplemental data — Add costs that a native integration does not surface, such as marketplace purchases, negotiated credits, or manual adjustments.
FinOps FOCUS Schema
FOCUS is an open-source schema that standardizes cost and usage billing data across different cloud providers. When you add a Custom Provider in Vantage, you use a CSV template format that is a subset of the FOCUS schema. Vantage supports columns from FOCUS 1.1–1.3. The fields in this template provide enough detail for Vantage to correctly render costs and perform cost allocation. With just the minimum required fields, Custom Provider costs are available with other Vantage features, such as Cost Alerts, Cost Anomaly Alerts, Report Notifications, and forecasting. See the explainer video below for an introduction to this feature and how FinOps FOCUS is used.Review CSV Format
To create a Custom Provider in Vantage, create a CSV file for your data that uses the following format. Add your provider’s cost and usage data to the file. Note that there is a maximum of 10,000 rows and a file size of 2MB allowed. Each time that you upload additional cost data, you will need to create a separate CSV file for that new dataset.ChargeCategoryChargePeriodStartBilledCostServiceName
If you want to upload amortized costs, then
ChargePeriodEnd is also required.Data Format
The following table provides details for each field within the template, as well as their Vantage representation on reports. Column names correspond to the FOCUS Column Library.If your CSV includes additional FOCUS 1.2 or 1.3 columns beyond those listed above—such as
AvailabilityZone, CommitmentDiscountId, EffectiveCost, ListCost, Provider, or Publisher—Vantage accepts the file without errors but does not use those columns for cost reporting. You do not need to remove extra columns before uploading.Upload Custom Provider File
Custom Provider files can be uploaded at any time in the console. The above schema adds a timestamp based on theChargePeriodStart column, so Vantage can place the data in the correct relationship to other costs under a Custom Provider.
Users must have Owner permissions to upload Custom Provider files. If you prefer to use the API rather than the Vantage console, see the API section below.
1
Navigate to the Integrations page in Vantage.
2
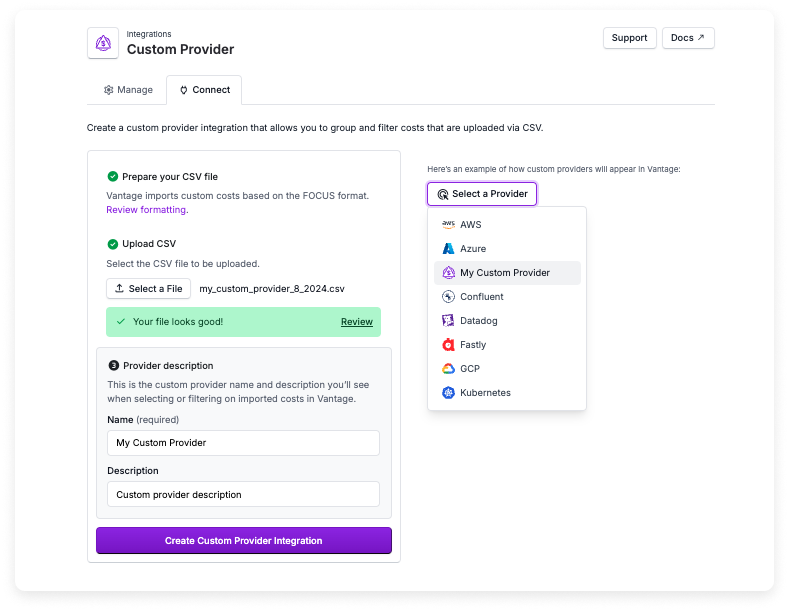
Select Custom Provider. (If you have already added a Custom Provider and are adding another one, ensure you are on the Connect tab.)
3
Optionally, click Select a File and upload your formatted CSV file. You can also skip the CSV upload and add cost data later via CSV or the API.
4
Click Upload Costs (or Skip if you did not upload a file).
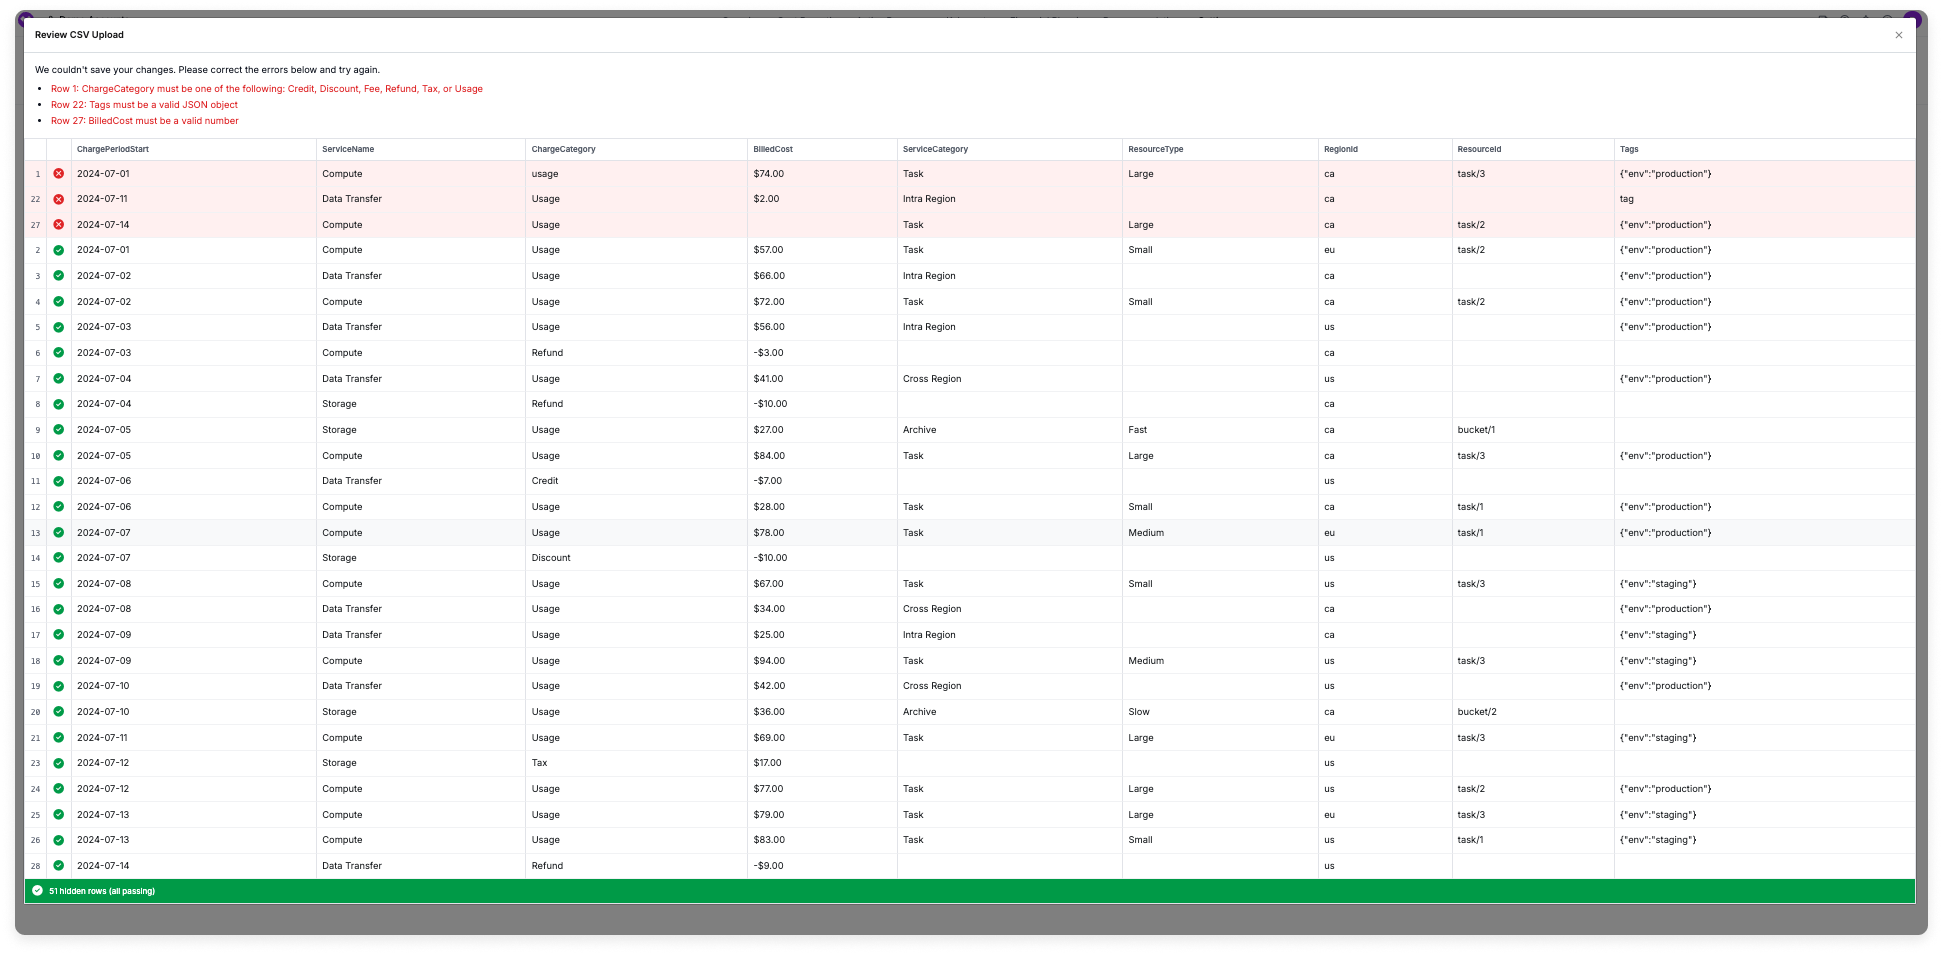
- If your CSV file contains any errors, the Review pop-up window is displayed and indicates where the error occurred. See the Troubleshooting section for details on specific errors.
Click to view example image
Click to view example image
- For error-free files, a message is displayed that indicates your file is okay. Click Review to see the first 25 rows of uploaded data.
Click to view example image
Click to view example image
5
Enter a Name for your Custom Provider. This is the name that will be displayed in report filters. Optionally, enter a Description.
6
Click Create Custom Provider Integration.
7
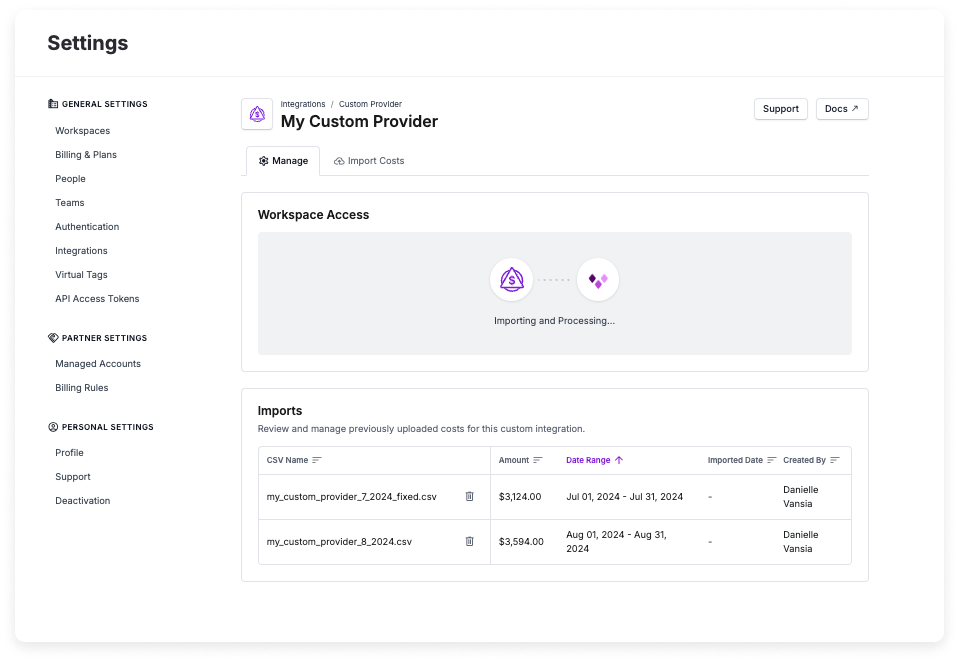
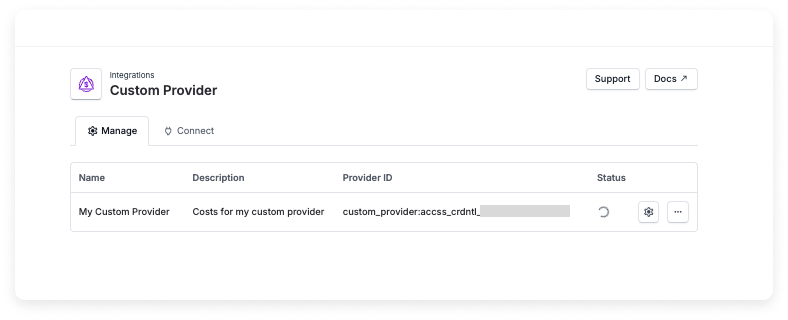
The Manage integration screen is displayed. Initially, the message Importing and Processing will be displayed on this screen. You can click the Import Costs tab if you want to upload additional cost files.
Click to view example image
Click to view example image
8
Once the import is complete and the integration status changes to Stable, in the Workspace Access section of this screen, select which workspaces this integration is associated with. See the Workspaces documentation for more information. See the Integration Status documentation for details on integration statuses.
Troubleshoot Custom Provider Uploads
When you upload a file that contains errors, the Review window is displayed and shows the rows where errors were identified. The first 25 rows are displayed. If you have an error in a row that’s not one of the first 25 rows, that row will be displayed at the top, along with all other errors. Some common errors are noted below.Steps to Resolve File Issues
1
After you’ve identified the issues, reopen your CSV file, correct the errors, and save.
2
On the Custom Provider upload screen, close the Review window, click Select a File, and upload the corrected version of your CSV file.
3
After a successful upload, a confirmation message is displayed. You can click Review to verify the first 25 rows of your uploaded data to ensure accuracy.
4
Follow steps 5–8 in the Upload Custom Provider File section to complete the upload process.
View Custom Provider Costs in Vantage
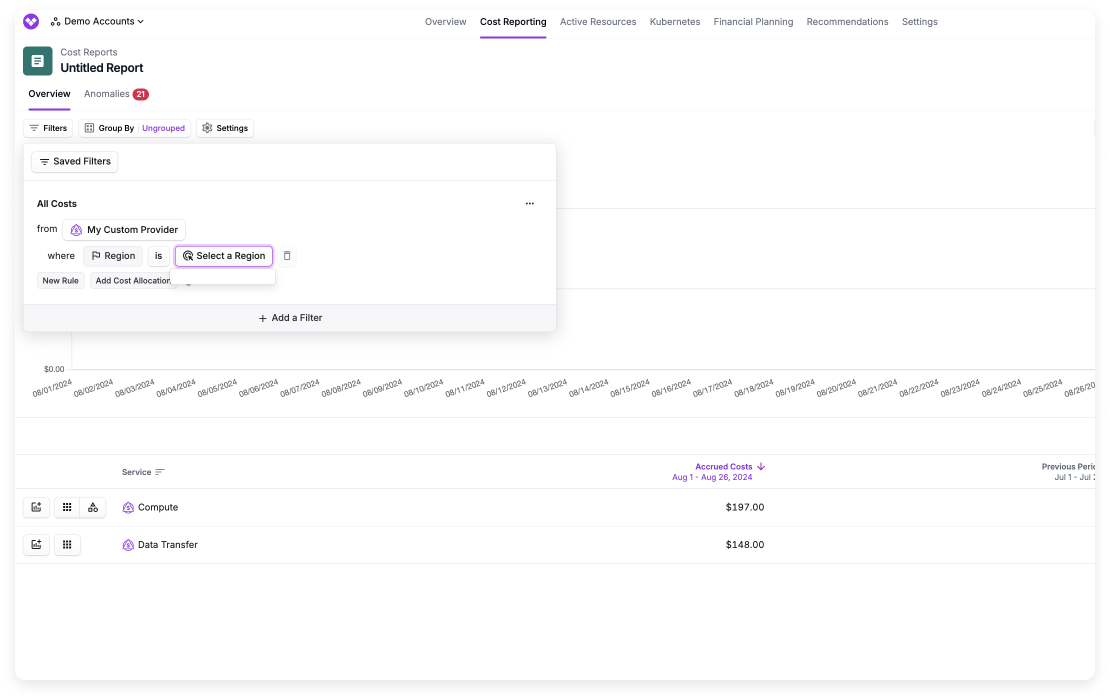
Once you have uploaded Custom Provider costs, you can query these costs in other Vantage tools. Your Custom Provider will be included in the Providers list of filters on Cost Reports, Segment Reports, and Saved Filters.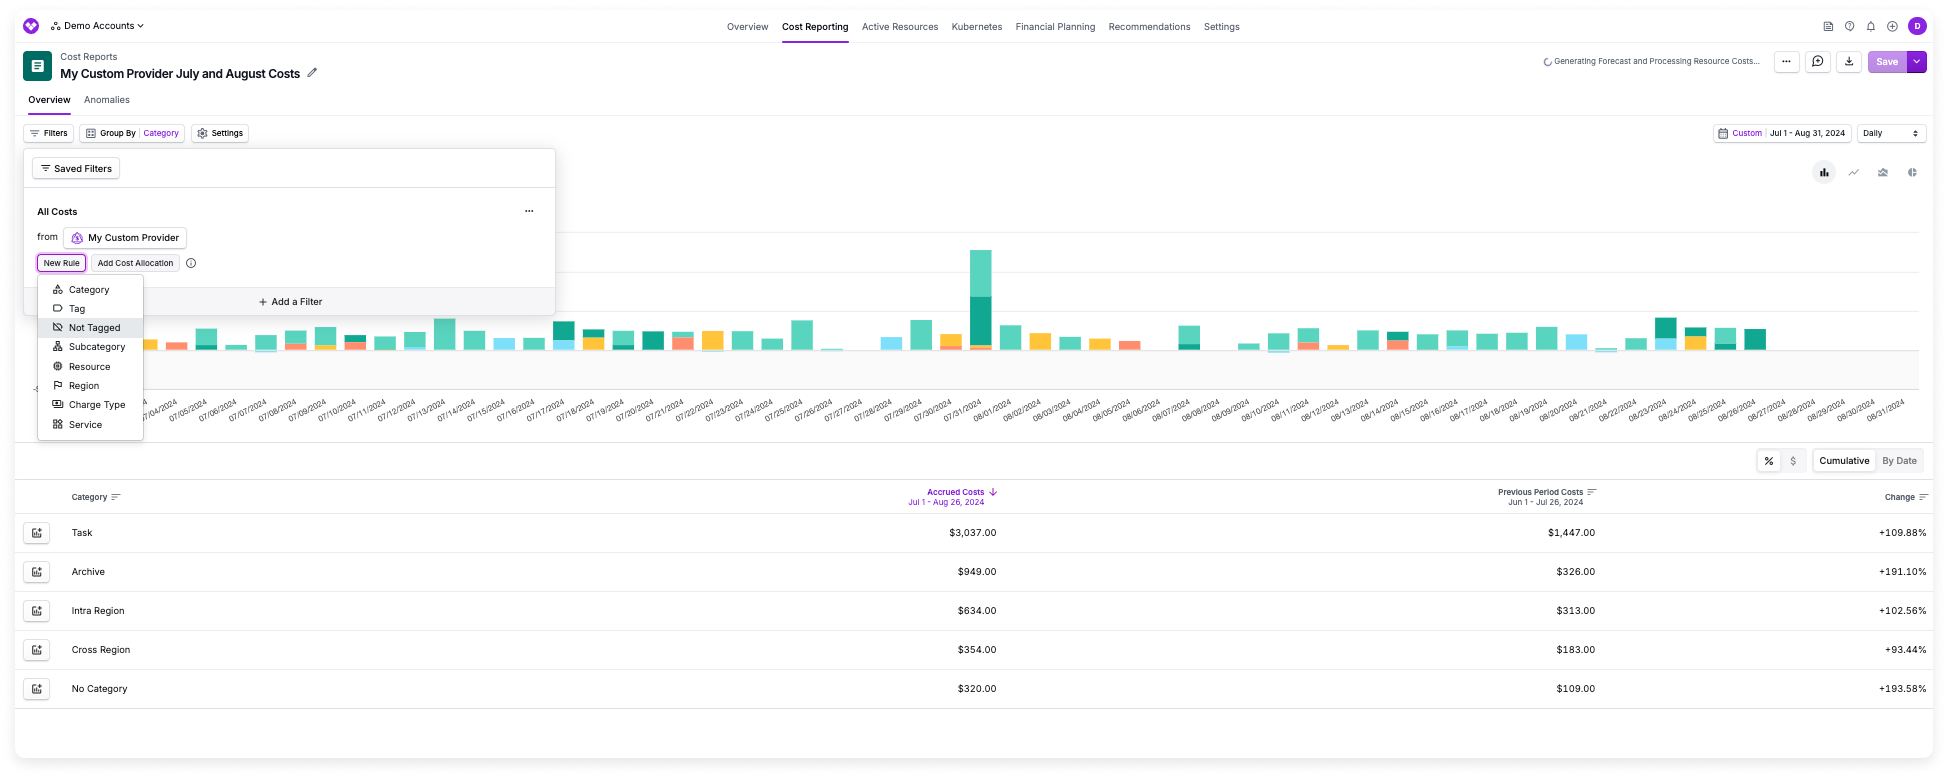
RegionId), then those filters will be displayed as empty.
Edit Custom Provider Name and Description
You can edit the name and description of your Custom Provider at any time after creation.1
Navigate to the Integrations page.
2
Select your Custom Provider.
3
On the Manage tab, in the Edit Provider Details section, update the Name or Description fields as needed. The name is displayed in report filters, so choose a name that helps you identify the provider.
4
Click Update Details to apply your changes.
Add Additional Imports
After the initial costs import, you can add additional cost imports.1
Navigate to the Integrations page.
2
Select your Custom Provider.
Click to view example image
Click to view example image
3
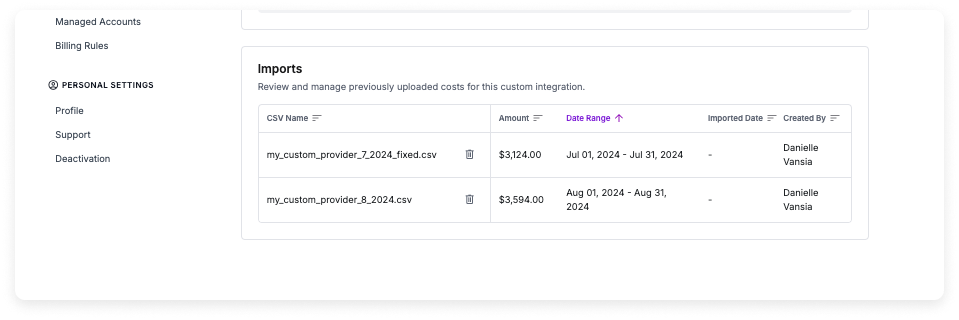
Click the Import Costs tab. Import your new cost file. Review any errors and correct as needed. Once uploaded, your file will be displayed within the Imports section of the Manage tab.
Delete Imported Files
If you want to delete an imported file, the costs will be removed from your Custom Provider.1
Navigate to the Integrations page.
2
Select your Custom Provider.
3
In the Imports section of the Manage tab, you can view existing imports along with the date the file was imported and who imported the file. Click the trashcan icon next to an import to remove it. If you delete a CSV, the corresponding data will be deleted from the provider.
Click to view example image
Click to view example image
Use the API to Add a Custom Provider
You can also use the API to create and upload costs for a Custom Provider.1
Send a
POST request to the /integrations/custom_provider endpoint to create the Custom Provider.2
On a successful
200 response, a Custom Provider token is returned.3
Use the
token to upload a CSV file via the /integrations/{integration_token}/costs.csv endpoint.4
If there are any errors, the following
422 response is returned. Fix the errors in your CSV, and upload a new file.