Advanced role-based access controls are available only for Enterprise tier accounts.
Understanding RBAC Roles
Vantage uses two kinds of roles:- Organization-Level Roles
- Team-Level Roles
Roles that apply to a user once per organization and control organization-wide actions (such as who can invite users, manage billing, or access settings).
How Team Roles Work
Understand Teams
A Vantage account contains one or more workspaces, each with its own set of Cost Reporting items (Cost Reports, Dashboards, Folders, etc.). Each workspace also has provider integrations assigned to it, which determine what underlying cost data is available in that workspace. Teams control which users can access which workspaces, and by extension, which cost data and Cost Reporting items they can see.Understand the Everyone Team
Every account starts with a default team called the Everyone team. All users are automatically members of this team and cannot be removed from it. A user’s role in the Everyone team mirrors their organization-level role (e.g., an Organization Editor becomes a Team Editor on the Everyone team). By default, the Everyone team has access to all workspaces, so every user can see everything. This works well for small organizations, but as your account grows you may need to restrict visibility, for example, ensuring that only the Finance department can see cost data in the Finance workspace. Additional teams let you control which users can see or edit items in each workspace, and optionally share individual items across team boundaries. In this example, the Everyone team has Can View access to both workspaces, so all users can see items in both. But only members of the Marketing team can create and edit items in the Marketing workspace, and only members of the Engineering team can create and edit items in the Engineering workspace. Organization Owners are the exception—they always have full access to all workspaces and Cost Reporting items regardless of team membership.Role Precedence
A user’s effective permission on a Cost Reporting item is determined by two criteria:- Workspace access: At least one of the user’s teams (including the Everyone team) must have the appropriate access level (Can Edit or Can View) to the workspace.
- Team role: The user must have an appropriate role (Team Owner, Team Editor, or Team Viewer) in that team.
Example: A lower team role doesn't reduce your access
Example: A lower team role doesn't reduce your access
Meagan is an Organization Editor, which makes her a Team Editor on the Everyone team. She is also added to the Marketing team as a Team Viewer. Both teams have Can Edit access to the workspace.Result: Meagan can edit items. Even though she is a Team Viewer on the Marketing team, Vantage checks each team independently. The Everyone team gives her Team Editor-level access, so she can edit.
Example: A designated team can grant more access than the Everyone team
Example: A designated team can grant more access than the Everyone team
Matt is an Organization Viewer, which makes him a Team Viewer on the Everyone team. He is also added to the Engineering team as a Team Owner. Both teams have Can Edit access to the workspace.Result: Matt can fully manage items on the Engineering team. His Team Owner role on the Engineering team satisfies both conditions (the team has Can Edit access and he has a Team Owner role), so he gets full control, even though his Everyone team role is only Team Viewer.
Example: Workspace access level limits what you can do
Example: Workspace access level limits what you can do
Rajan is a Team Editor on the Marketing team, but the Marketing team only has Can View access to the workspace. Rajan is also a Team Viewer on the Everyone team, which has Can Edit access.Result: Rajan can only view items. Through the Marketing team, the Can View workspace access prevents editing, regardless of his Team Editor role on that team. Through the Everyone team, he has Can Edit workspace access, but his Team Viewer role only allows viewing. Neither team satisfies both conditions for editing.
Example: Multiple teams with access to the same item
Example: Multiple teams with access to the same item
Tara is on the Marketing team as a Team Owner and on the Engineering team as a Team Viewer. Both teams have access to the same Saved Filter.Result: Tara gets Team Owner-level access. Vantage checks each team independently, and the Marketing team gives her Team Owner permissions, so she can edit the Saved Filter and manage which teams can access it.
Manage Account Access
Only Organization Owners can invite or remove users and change another user’s organization-level role. Navigate to Settings > People to manage users.- Add a New User
- Change a User's Organization Role
- Click Invite People.
- Enter the new user’s email, select their organization-level Role, and optionally assign them to Teams.
- Click Send Invitation.
If you assign the user to a team during invite, ensure that at least one of their teams has Can View or Can Edit access to a workspace. Users without workspace access may see an error when accepting an invitation or when they first sign in.
Manage Teams
Create or Delete Teams
Only Organization Owners can create new teams. Organization Owners and Team Owners can delete teams (except the default Everyone team). By default, you will be made the Team Owner of any new team you create. You can invite and manage members once this team has been created.View screenshot
View screenshot
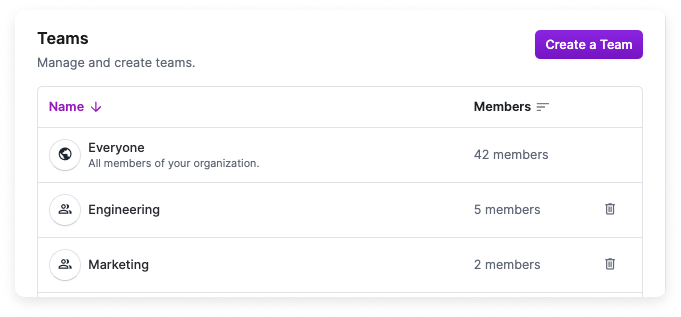
- To create a team, click Create a Team, add a Name and Description, then click Create Team.
- To delete a team, hover over the team name and click the trashcan icon.
Map Team to SSO Groups (Organization Owners Only)
Organization Owners can map SSO groups to teams within Vantage. Teams must be created first, then follow the Set Up SSO Group Mapping for Teams instructions.Manage Team Members and Access
To manage a team, select it from the Teams list. Organization Owners and Team Owners can perform the actions below.View screenshot
View screenshot
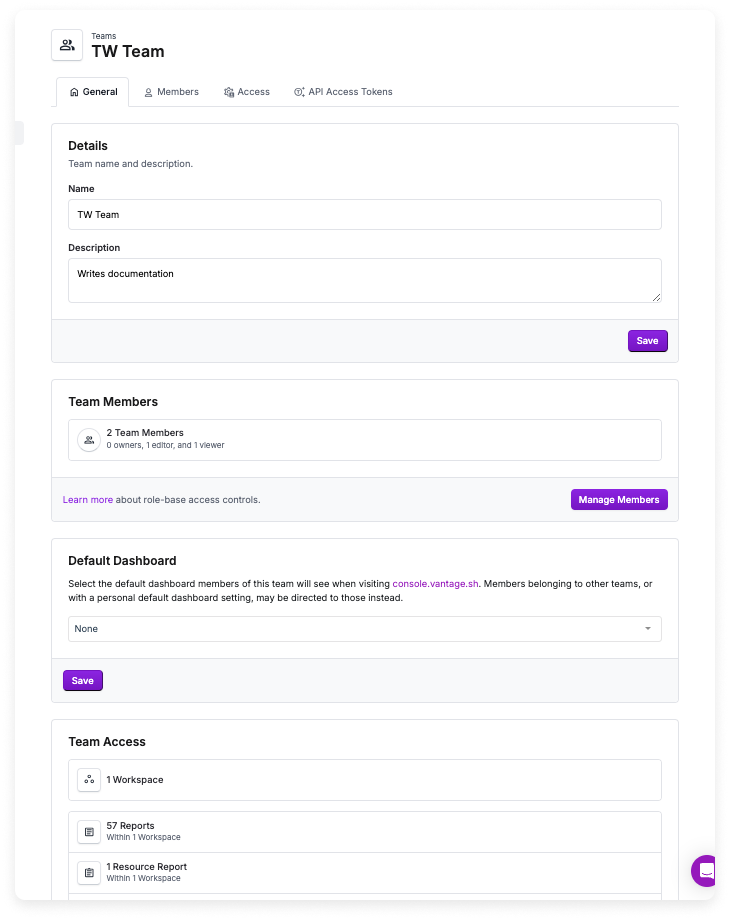
- General—Edit the team name, description, and set a default dashboard. The default dashboard option is not available for the Everyone team.
If you set a default dashboard, members who belong to other teams with default dashboards or with a personal default dashboard already configured, may be directed to those dashboards instead.
- Members—Add or remove members and change their team-level role.
- Access—Set workspace access levels and view Cost Reporting items with granted access.
- API Access Tokens—Create API service tokens that inherit the team’s permissions.
- Add a Member
- Remove a Member
- Change Member's Role
- Manage Workspace Access
- View Granted Access
- On the Members tab, click Add Members.
- Select member(s) from the list.
- Click Add People.
Manage Access for Specific Cost Reporting Items
By default, a team’s access to Cost Reporting items is determined by its workspace access level. If a team has Can Edit or Can View access to a workspace, its members can see all items in that workspace. However, Organization Owners and Team Owners can override this behavior for individual items using direct item grants. Direct item grants let you:- Share a specific item with a team that doesn’t have access to the workspace it lives in. For example, an Organization Owner can share an executive dashboard from the Finance workspace with the Engineering team, without giving Engineering access to everything in Finance.
- Block a team from a specific item, even if the team has access to the workspace. For example, a Team Owner on the Finance team can prevent the Everyone team from seeing a sensitive Cost Report, while still allowing the Finance team to access it.
Organization Owners always have full access to all Cost Reporting items, regardless of direct item grants. A Cannot Access grant does not block Organization Owners.
Set Direct Item Grants
Organization Owners and Team Owners (on teams with Can Edit workspace access) can manage direct item grants.- From the Item List
- From Inside an Item
- Navigate to Reporting and select the item category (e.g., Cost Reports, Segments). For Resource Reports, click Active Resources > Resource Reports.
- Hover over the item, click the ellipsis (…), and select Manage Access.
- For each team, set the access level:
- Can Access—The team can see (and, depending on their role, edit) the item, even if the team doesn’t have workspace access.
- Cannot Access—The team is explicitly blocked from the item, even if the team has workspace access.
- Reset Access—Removes the direct grant, so the team’s access is determined by its workspace access level. If the team has no workspace access, they lose access to the item.
View screenshot
View screenshot


Cross-Workspace Item Grants
When a team is granted direct access to an item in a workspace they don’t otherwise have access to, team members can view that specific item, but they cannot browse other items in the workspace. Only items with an explicit grant are visible. When a user opens a shared item in another workspace, Vantage temporarily switches them into that workspace for up to 24 hours. During this time, a yellow banner appears at the top of the console indicating they are temporarily in the workspace. After 24 hours, the temporary access expires and the user is returned to their default workspace on the next page load. They can re-open the shared item at any time to get another temporary session.If a team has a direct grant on a folder, team members can also see the items inside that folder.