Connect Your Coralogix Account
Prerequisites
- You will need to be an Organization Admin in Coralogix.
- Create a free Vantage account, then follow the steps below to connect to Coralogix.
Create the Connection
Log in to the Coralogix dashboard.
Under Alerts, Rules and Tags API Key, click GENERATE NEW API KEY. Click the copy icon next to the key and copy the generated key.

Click to view example image
Click to view example image

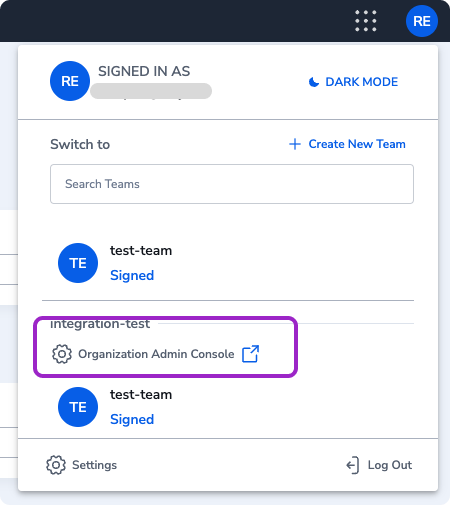
In the top-right corner of the navigation bar, click your user profile icon. Then, select Organization Admin Console.

Click to view example image
Click to view example image

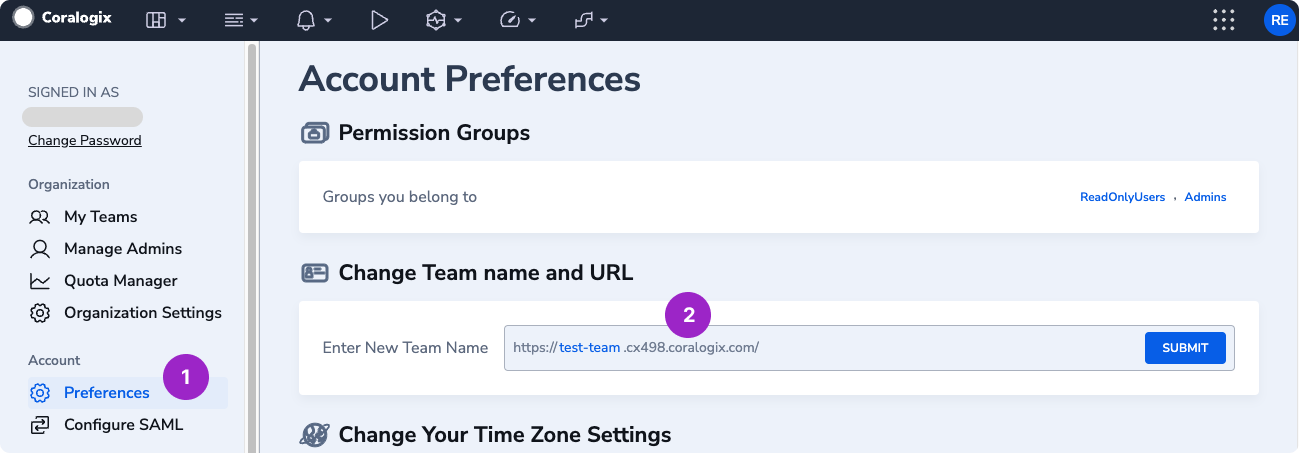
The Organization Admin Console screen is displayed. From the left navigation menu, under Account, select Preferences.
The Account Preferences screen is displayed. In the Change Team name and URL section, copy the part of the domain after your team’s name. For example, if your domain is

https://test-team.cx498.coralogix.com/, then copy only cx498.coralogix.com.Click to view example image
Click to view example image

Navigate to the Integrations page in Vantage.
Enter a Description for this connection. The Description is your team name and is also available in your Coralogix domain URL (e.g., in
https://test-team.cx498.coralogix.com/, use test-team).Based on limits imposed by Coralogix, the integration includes 90 days of historical Coralogix usage and cost data. Once costs are processed, they will be available on your All Resources Cost Report.
Next Steps - Manage Workspace Access
Once the import is complete and the integration status changes to Stable, you can select which workspaces this integration is associated with. See the Workspaces documentation for information.Data Refresh
See the provider data refresh documentation for information on when data for each provider refreshes in Vantage.Custom Discounts and Rates
If you have custom rates or discounts negotiated with Coralogix, Vantage can implement these into your cost calculations. Please contact Vantage Support to set up custom rates. When using custom rates, please double-check your calculations and stay on top of any adjustments made to future rates so we can continue to update them accordingly.Coralogix Reporting Dimensions
On Coralogix Cost Reports, you can filter costs across several dimensions:- Service (e.g., Logs, Metrics, Spans)
- Category (subsystem name)
- Subcategory (application name)
- Tag (virtual tags created in Vantage for this provider)
