> ## Documentation Index
> Fetch the complete documentation index at: https://docs.vantage.sh/llms.txt
> Use this file to discover all available pages before exploring further.
# Confluent
> Learn how to integrate Vantage with Confluent.
Vantage integrates with your Confluent account using a Confluent API key and secret to access the [Billing API](https://docs.confluent.io/cloud/current/billing/overview.html#retrieve-costs-for-a-range-of-dates). This endpoint provides structured cost data, broken down by category (e.g., Kafka or Connect), resource (e.g., Kafka Cluster), and subcategory (e.g., Kafka Storage or Connect Capacity).
Vantage currently supports the following Confluent products:
* Kafka
* Connect
* KSQL
* Audit Logs
* Cluster Links
* Custom Connect
* Support Cloud
## Connect Your Confluent Account
### Prerequisites
* You must have a Vantage **Organization Owner** or **Integration Owner** role to add or remove this integration. See the [Role-Based Access Control](/rbac) documentation for details.
* [Create a free Vantage account](https://console.vantage.sh/signup), then follow the steps below to generate a Confluent API key.
Vantage will never perform write operations and will only read from the Billing API and Organizations API.
### Create the Connection
Generate an API key, create a service account, then attach the right role to the service account.
#### Step 1 - Generate an API Key and Service Account
Log in to the [Confluent Cloud console](https://confluent.cloud/login).
From the top right of the console, click the hamburger menu.
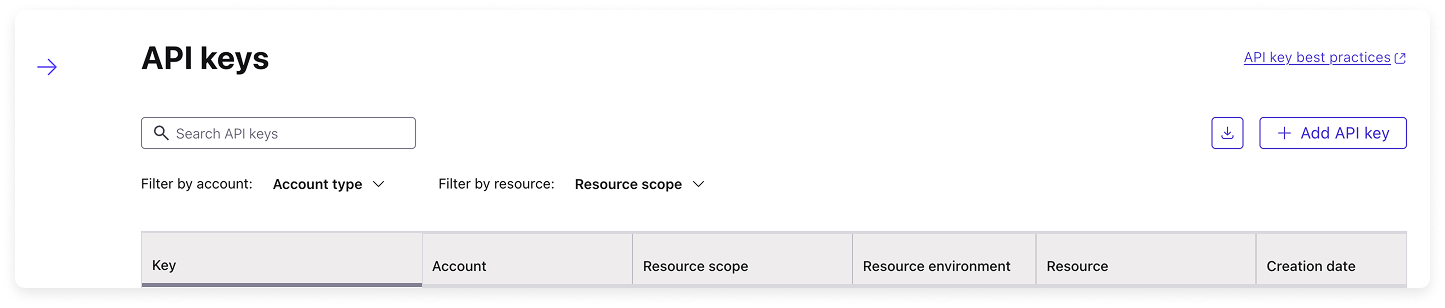
Under **ADMINISTRATION**, click **API keys**.
Click **+ Add API key**.
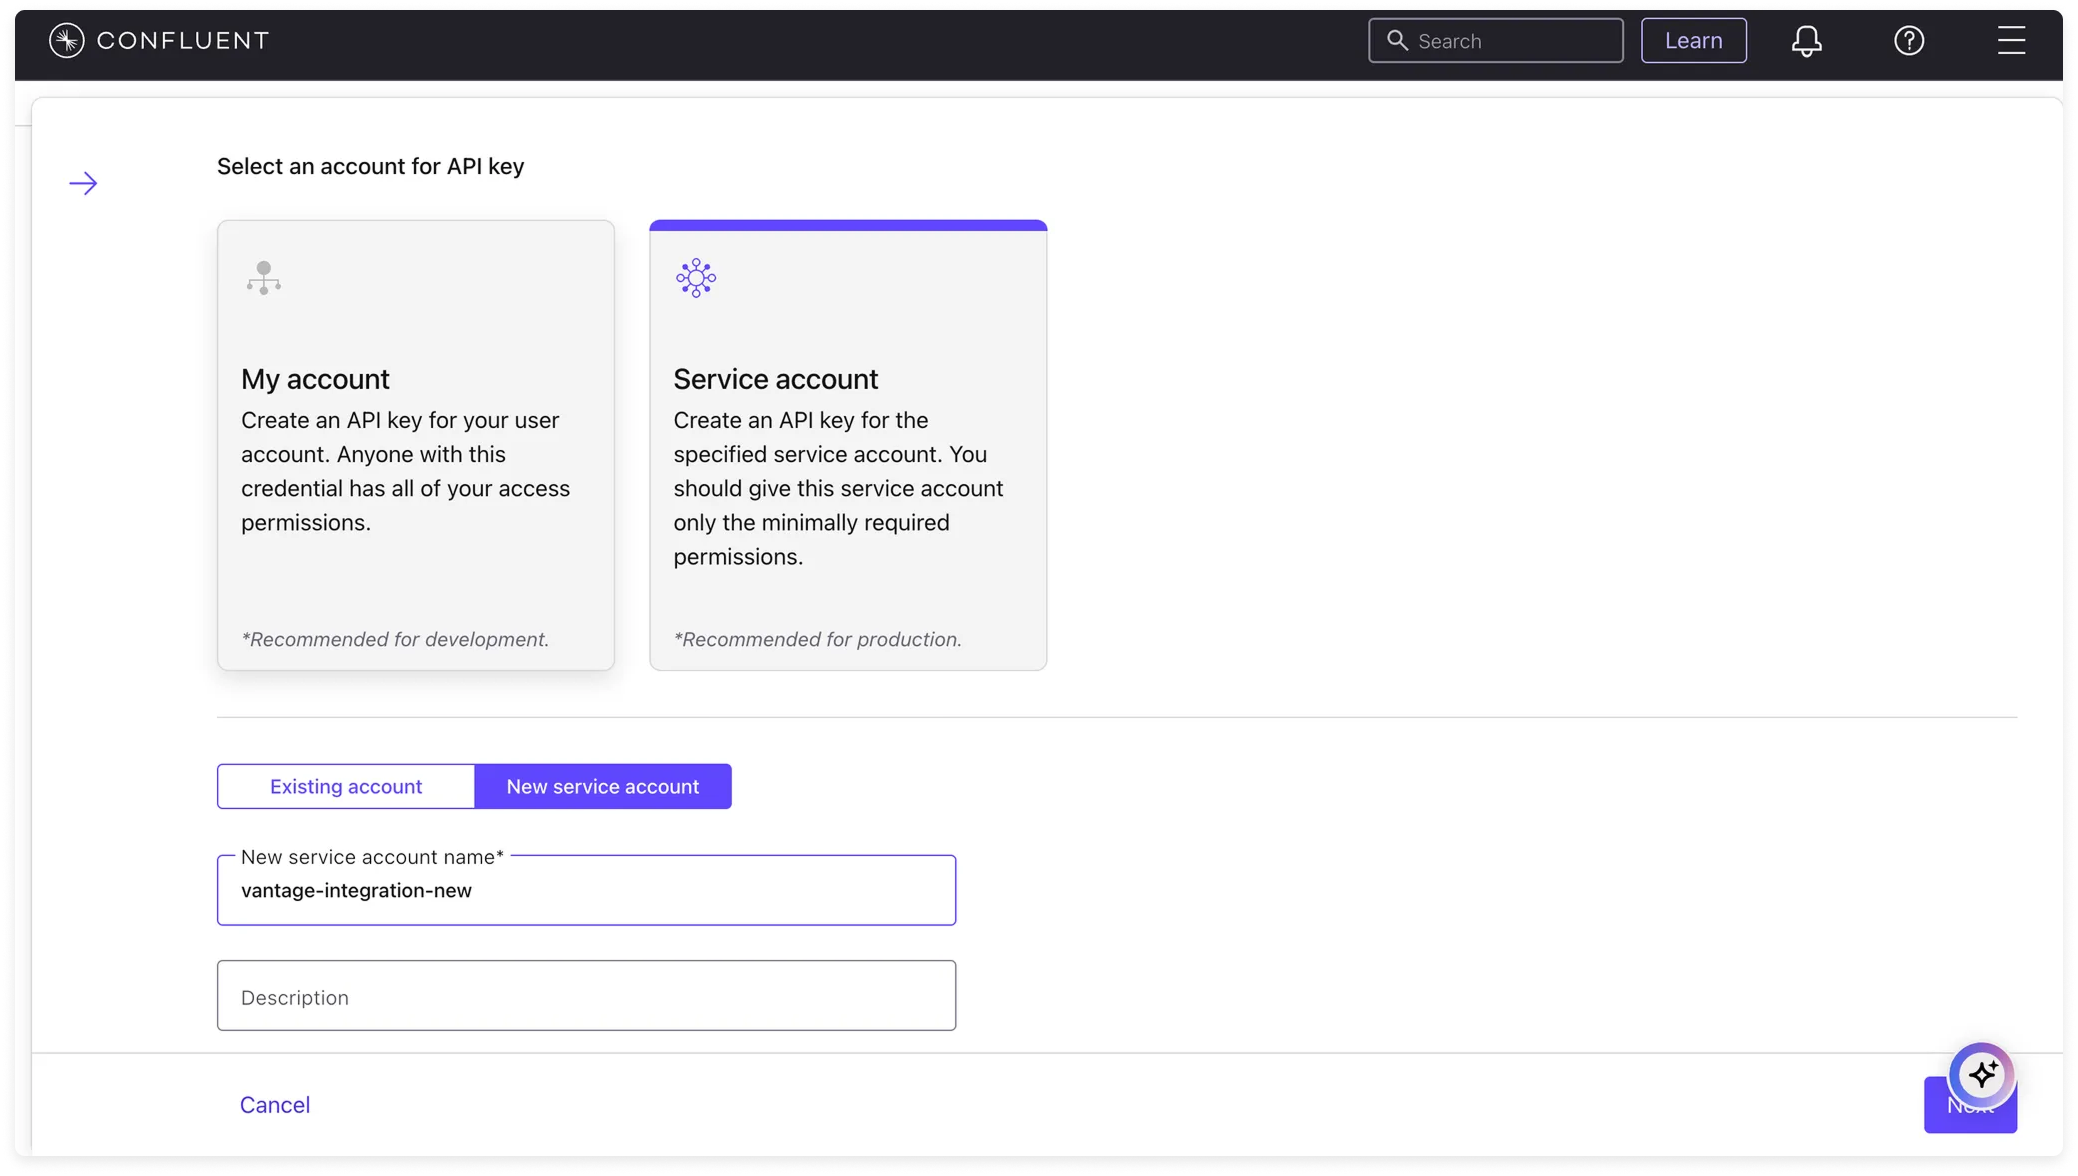
For **Select an account for API key**, click **Service account**.
Select an existing service account or create a new one, then click **Next**.
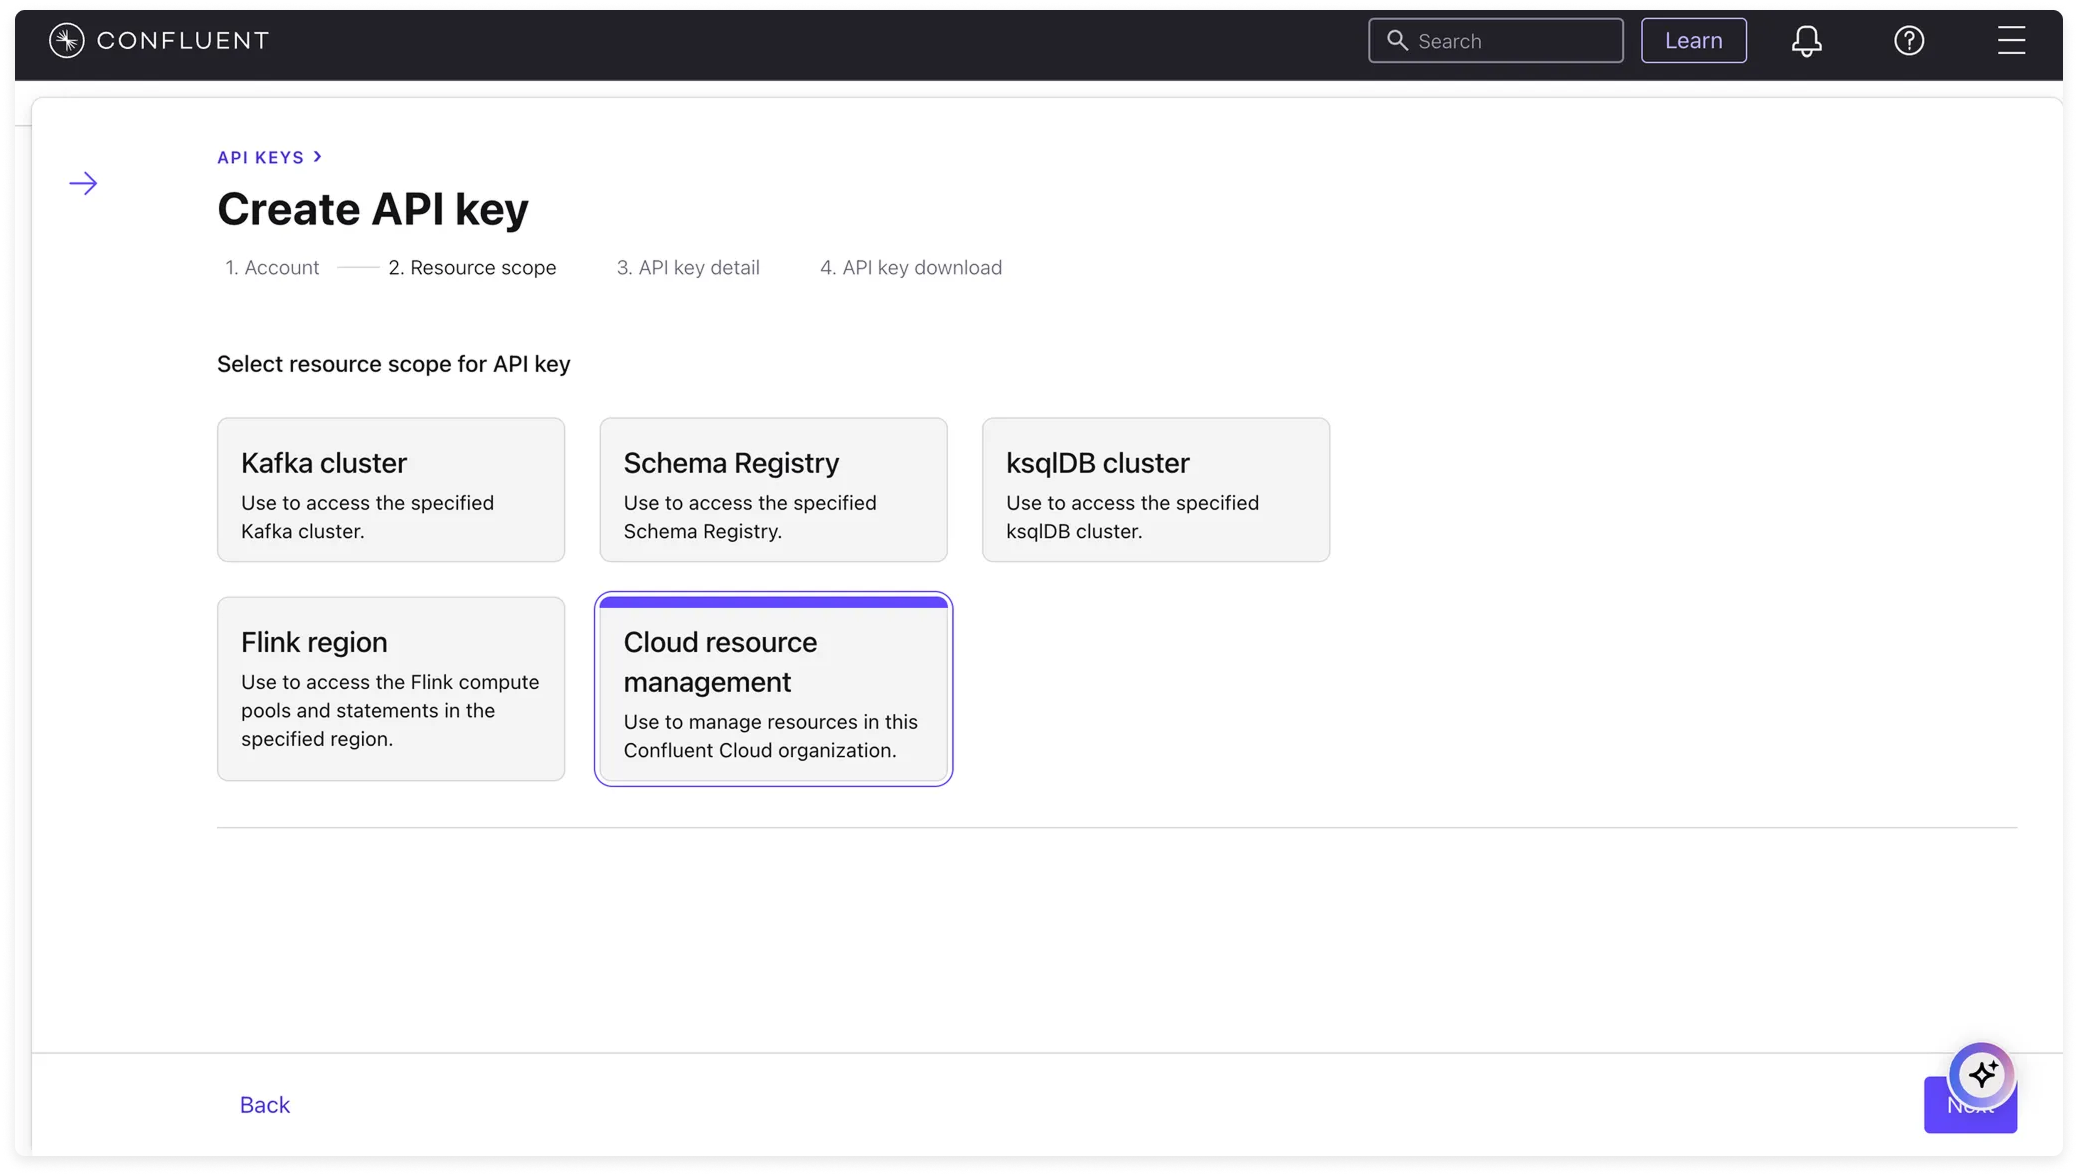
For **Select resource scope for API key**, select **Cloud resource management**. Click **Next**.
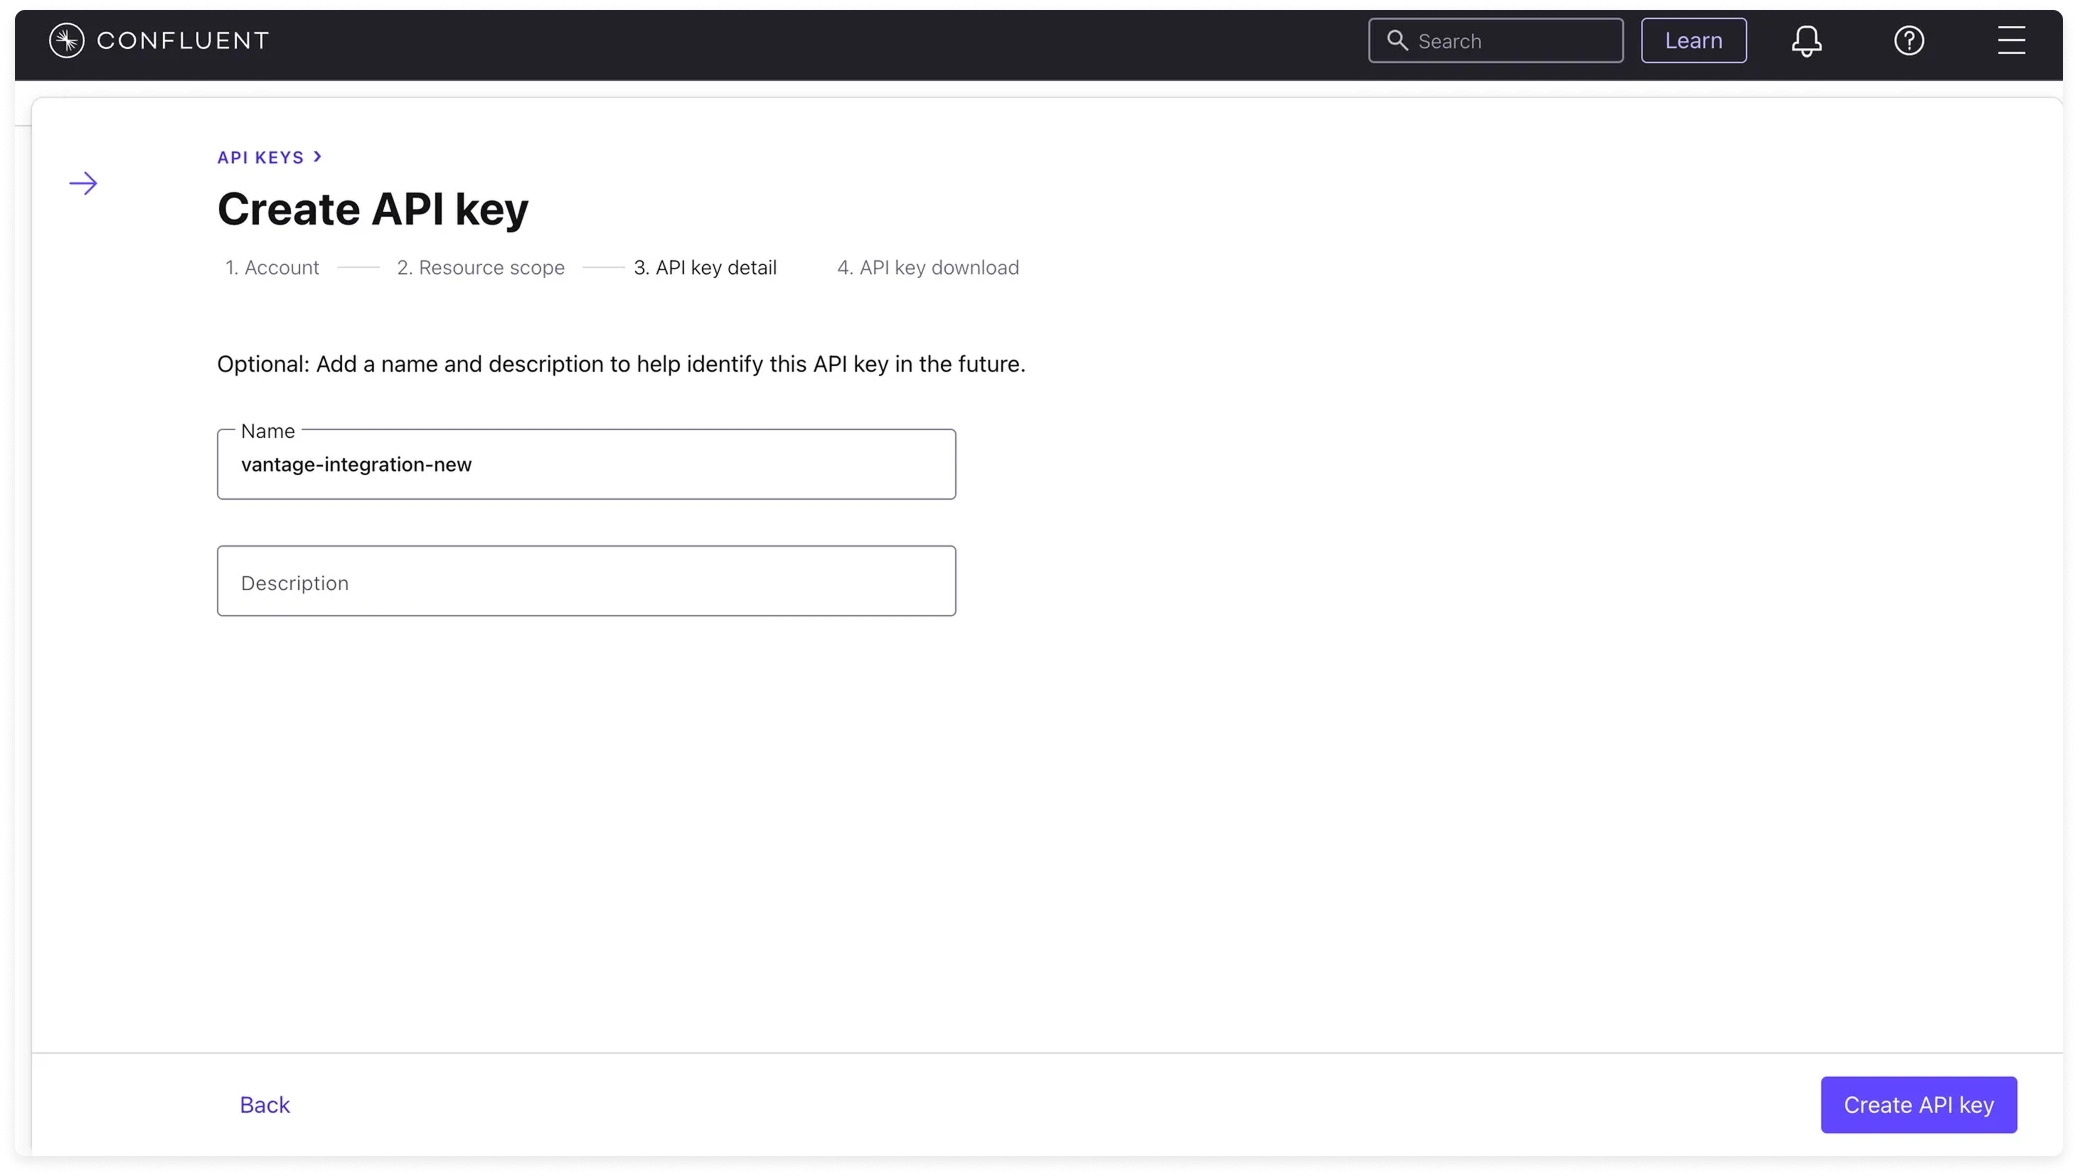
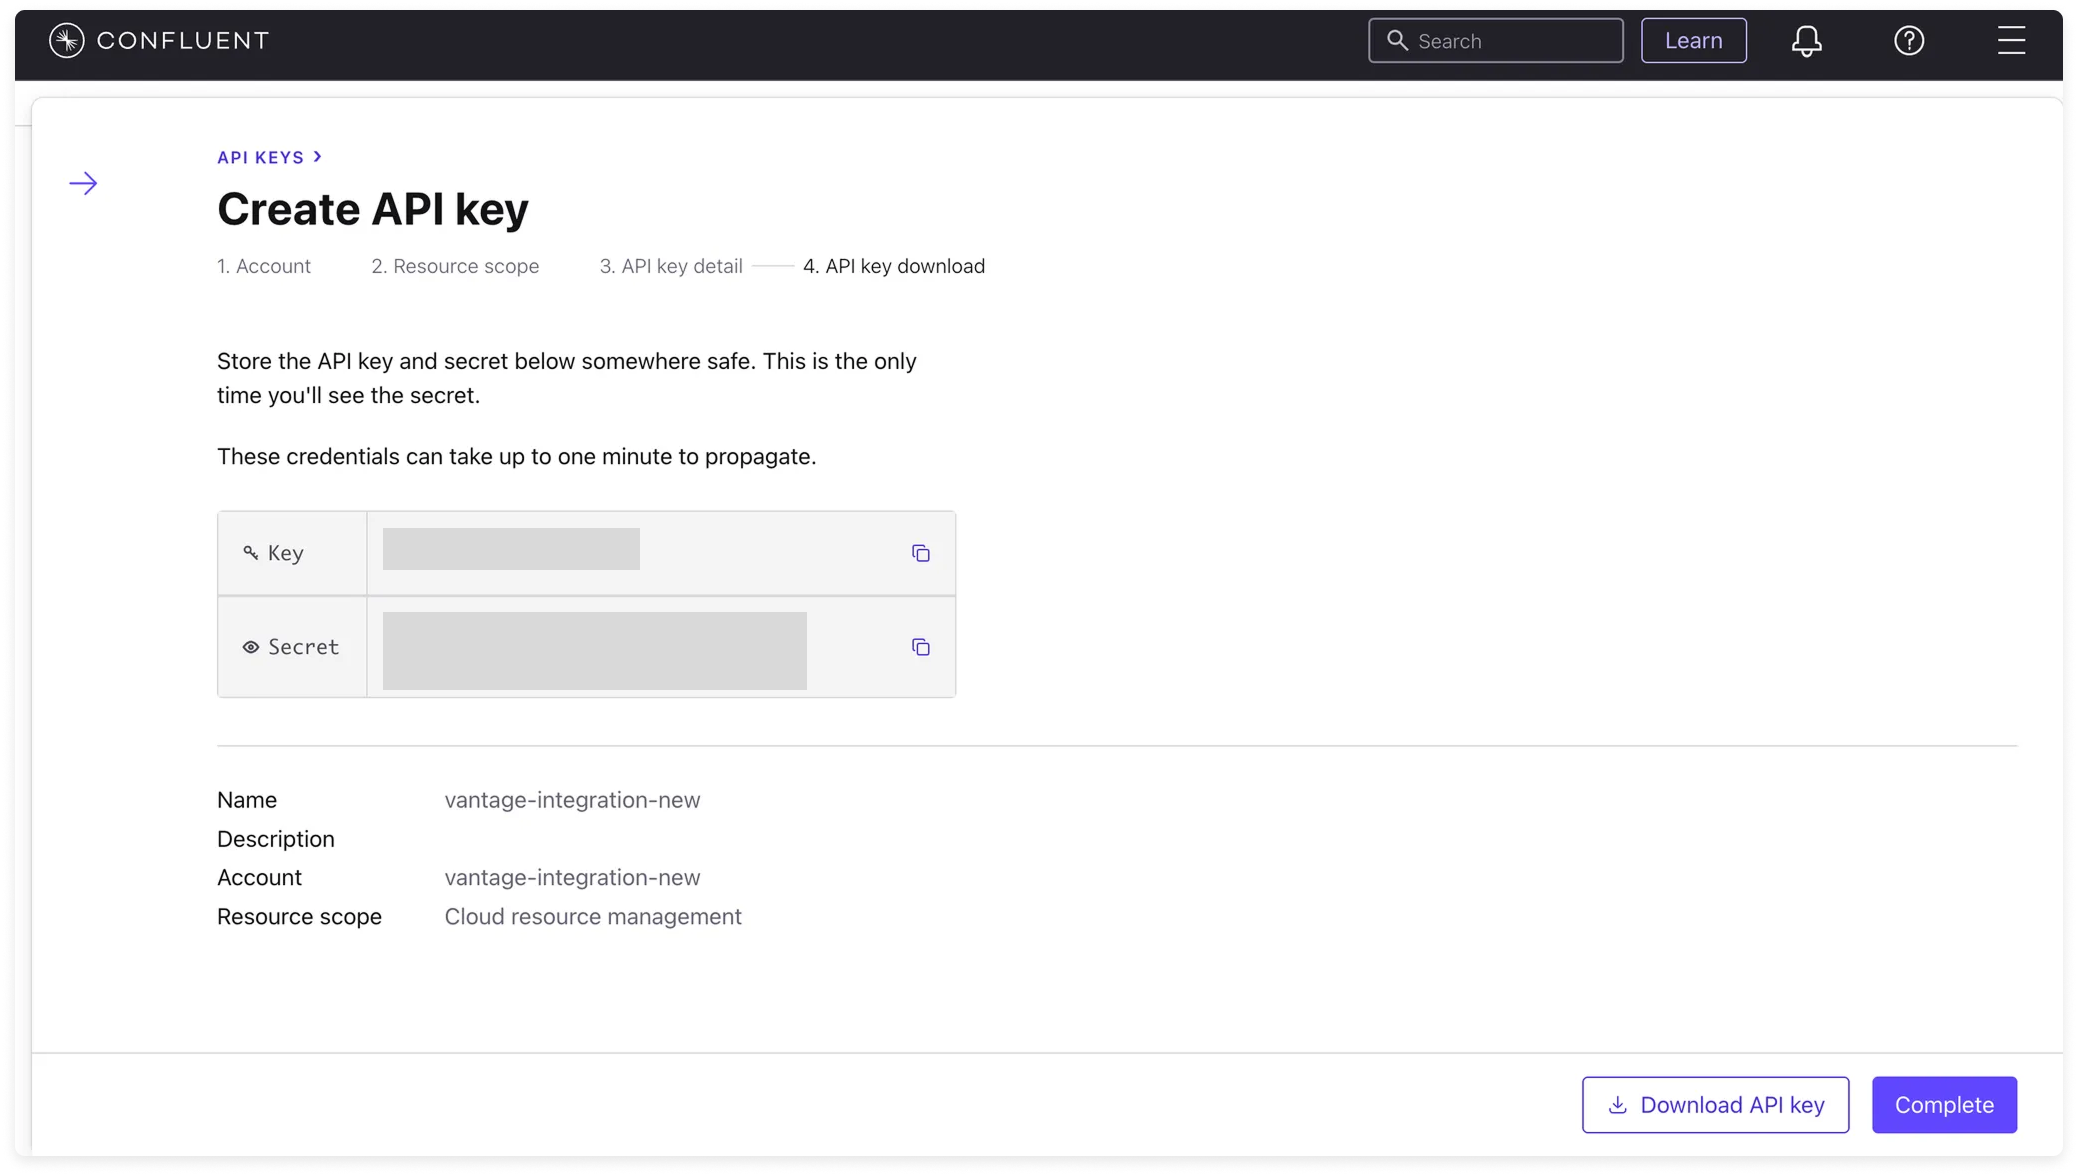
Add a name and description for the key, then click **Create API key**.
Copy the displayed key and the secret to add to Vantage. You can also download a copy of the API key from this screen.
#### Step 2 - Add the `BillingAdmin` Role to the Service Account
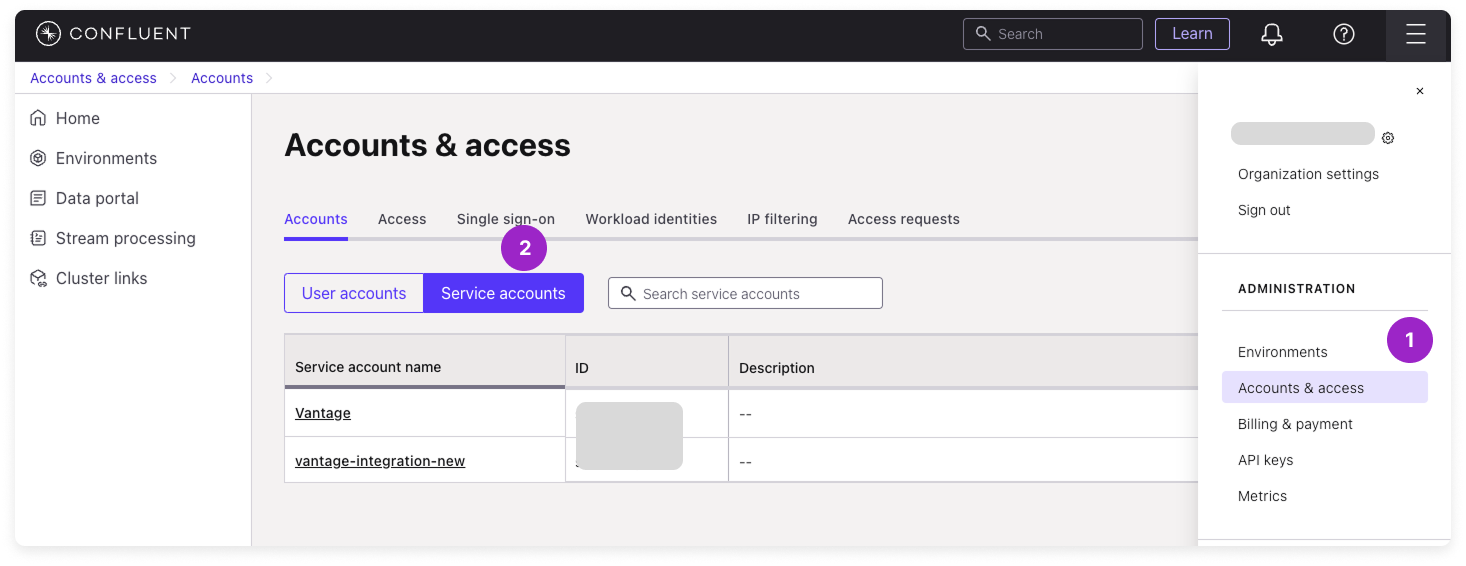
From the top hamburger menu of the Confluent Cloud console, select **Accounts and access**.
On the **Accounts and access** page, select the **Service accounts** tab, then open the service account you associated with the integration API key.
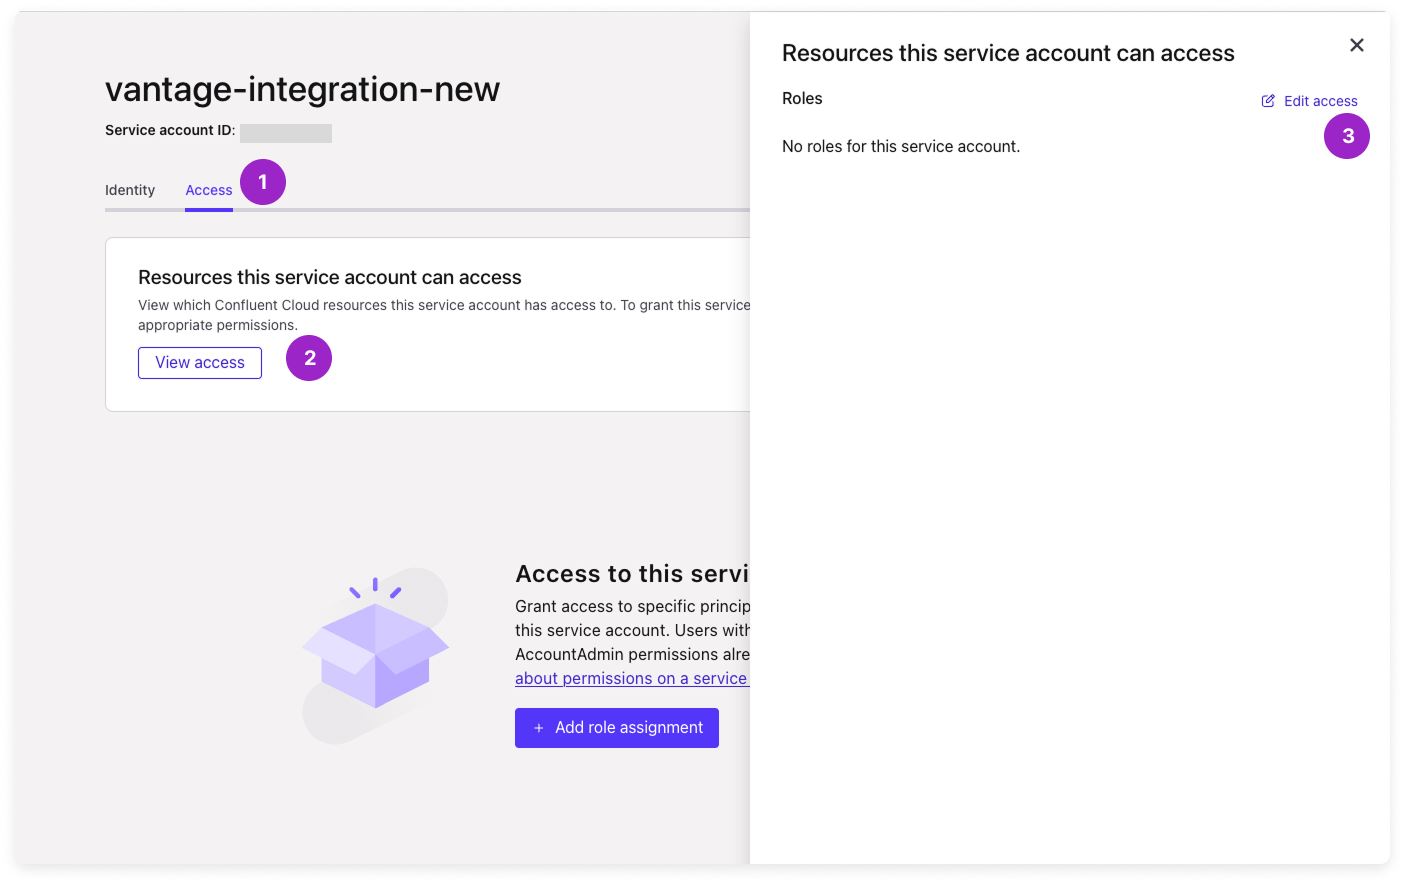
Click the **Access** tab, then click **View access**.
On the **Resources this service account can access** slideout, click **Edit access**.
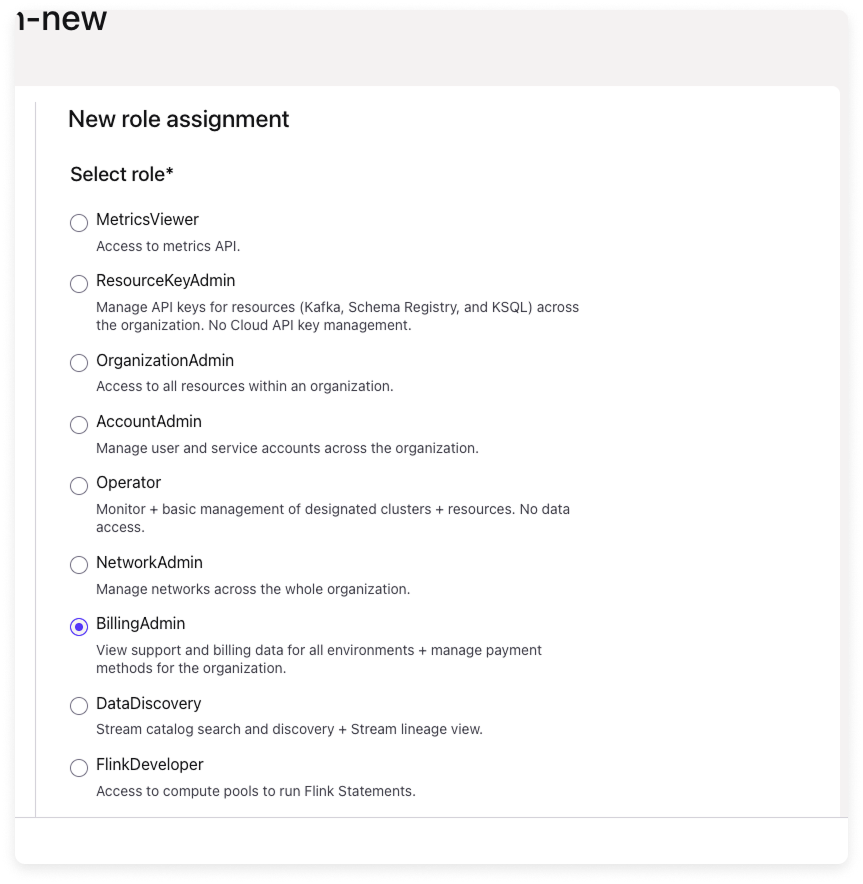
Click **+ Add role assignment**. Select the **BillingAdmin** role, then scroll down and click **Add**.
Click **Save**.
#### Step 3 - Add the API Key to the Vantage Console
From the top navigation in Vantage, click **Settings**.
On the left navigation, select **Integrations** and select **Confluent**.
The Confluent integrations page is displayed. Ensure you are on the **Connect** tab.
At the bottom of the page, click **Add API Key** and paste your newly generated **API key** and **API secret**.
Click **Connect Account**.
After adding your integration, you will see the status of your integration change to **Importing** within the Vantage console. This status indicates that Vantage is actively importing your Confluent cost data. See the [Integration Status](/vantage_account#integration-status) documentation for details on integration statuses.
As soon as the costs are processed, they will be available on your **All Resources** Cost Report. If you decide to remove your Confluent integration from Vantage, all costs associated with your Confluent API key will be removed from the Vantage console.
#### Next Steps - Manage Workspace Access
Once the import is complete and the integration status changes to **Stable**, you can select which workspaces this integration is associated with. See the [Workspaces](/workspaces#manage-workspace-provider-integrations) documentation for information.
## Data Refresh
See the [provider data refresh documentation](/provider_data_refresh) for information on when data for each provider refreshes in Vantage.
## Active Resources
Confluent Kafka Clusters are synced as active resources and available in [resource reports](/active_resources).
## Confluent Reporting Dimensions
On Confluent [Cost Reports](/cost_reports/), you can filter costs across several dimensions:
* Category (e.g., Kafka Storage)
* Tag ([virtual tags](/tagging) created in Vantage for this provider)
* Resource (resource service ID)
* Charge Type (e.g., Usage)
* Organization (organization ID)
* Service (e.g., Kafka)
You can also view credits or discounts for Confluent costs in Cost Reports.
1. At the top of any Confluent Cost Report, click **Settings**.
2. Then, toggle on/off **Credits** and/or **Discounts**.