> ## Documentation Index
> Fetch the complete documentation index at: https://docs.vantage.sh/llms.txt
> Use this file to discover all available pages before exploring further.
# ClickHouse Cloud
> Learn how to integrate Vantage with ClickHouse Cloud.
Vantage connects to your ClickHouse Cloud account via a read-only API key with Developer permissions to ingest ClickHouse usage, costs, and discounts from ClickHouse's Organization [usageCost API](https://clickhouse.com/docs/cloud/manage/api/usageCost-api-reference). Vantage displays ClickHouse Cloud costs and associated [usage metrics](/usage_based_reporting).
The ClickHouse Organizations usageCost API only supports ClickHouse Cloud and Bring Your Own Cloud (BYOC).
You can view usage data for ClickHouse Cloud consumption. Usage is measured by the following subcategories:
* Compute
* Storage
* [Data transfer](https://clickhouse.com/docs/cloud/manage/network-data-transfer) (egress over the internet and cross-region)
* [ClickPipes](https://clickhouse.com/docs/integrations/clickpipes)
Usage is measured in ClickHouse Cloud Credits (CHCs), which is a metering unit used by ClickHouse.
You can learn more about CHCs through [ClickHouse Billing documentation](https://clickhouse.com/docs/en/cloud/manage/jan-2025-faq/billing).
You can integrate multiple ClickHouse Cloud integrations by providing read-only tokens for multiple organizations.
## Connect Your ClickHouse Cloud Account
### Prerequisites
* You must have a Vantage **Organization Owner** or **Integration Owner** role to add or remove this integration. See the [Role-Based Access Control](/rbac) documentation for details.
* Create a free Vantage account, then follow the steps below to integrate ClickHouse Cloud costs.
Vantage cannot perform writes to your ClickHouse Cloud organization. Vantage is only able to see metadata associated with your usage.
### Create the Connection
The below instructions for creating an API key are based on the [ClickHouse documentation](https://clickhouse.com/docs/cloud/manage/openapi).
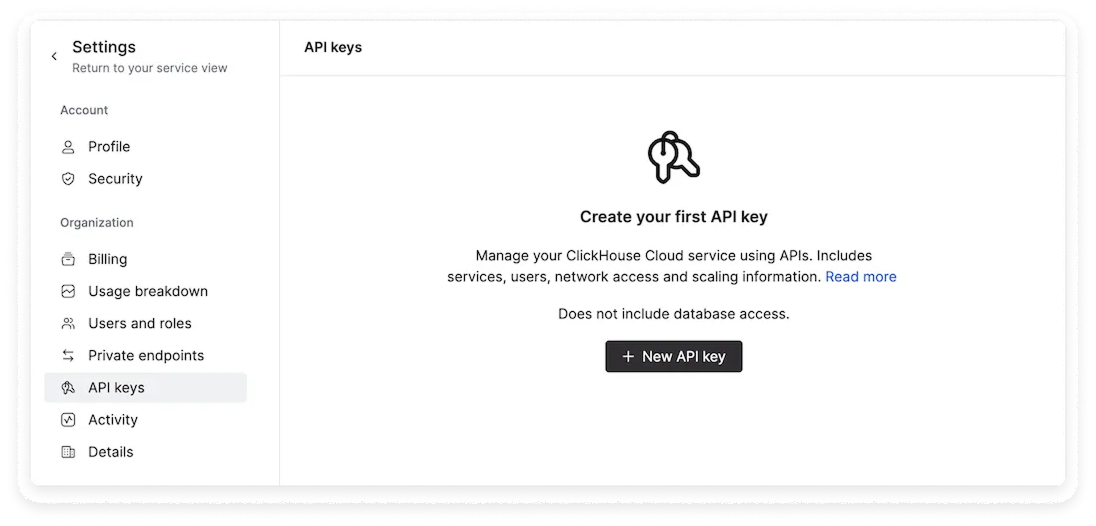
In the ClickHouse Cloud console, navigate to the **Settings** menu. Then, select **API keys**.
Click **+ New API key**.
Add the following key details:
* For **API key name**, enter *vantage*.
* For **Expiration date**, select an expiration date. If the key expires, you will need to supply Vantage with a new ClickHouse Cloud API key.
* For **Organization role**, select **Developer**. (You can read more about roles and permissions in the [ClickHouse documentation](https://clickhouse.com/docs/cloud/security/cloud-access-management/overview).)
* For **Service roles**:
* Under **Access scope**, select **All services**.
* For **Role**, select **Query Endpoints**.
* For **Allow access to this API key from**, select **Anywhere**.
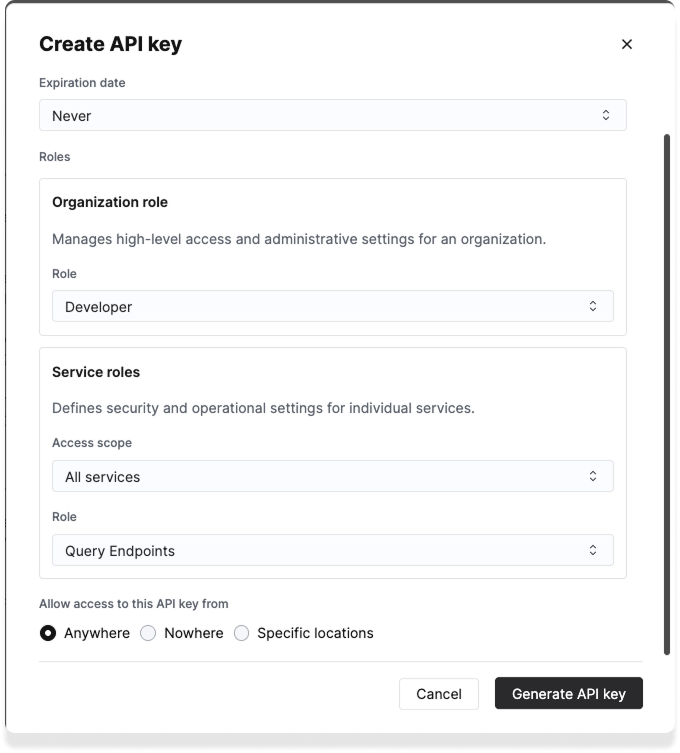
Click **Generate API Key**.
If you have any IP restrictions set, ensure you allow the following IP addresses for Vantage:
* `54.87.66.45`
* `3.95.43.133`
* `54.162.3.72`
* `44.199.143.63`
* `3.218.103.23`
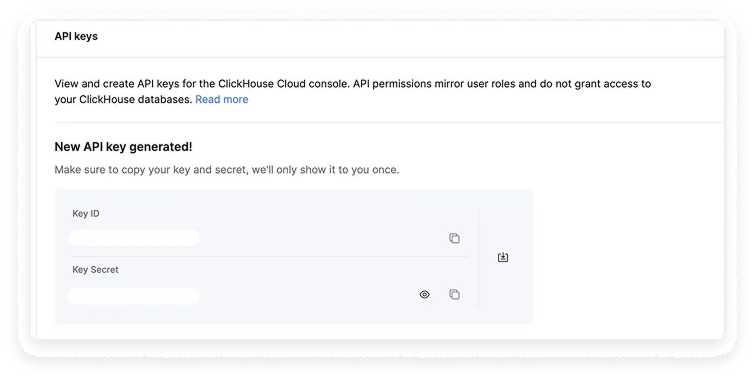
Copy the newly generated **Key ID** and **Key Secret**.
From the top navigation in Vantage, click **Settings**.
On the left navigation, select **Integrations** and select **ClickHouse Cloud**.
The ClickHouse Cloud integrations page is displayed. Ensure you are on the **Connect** tab.
At the bottom of the page, click **Add API Key** and paste your newly generated API key and secret.
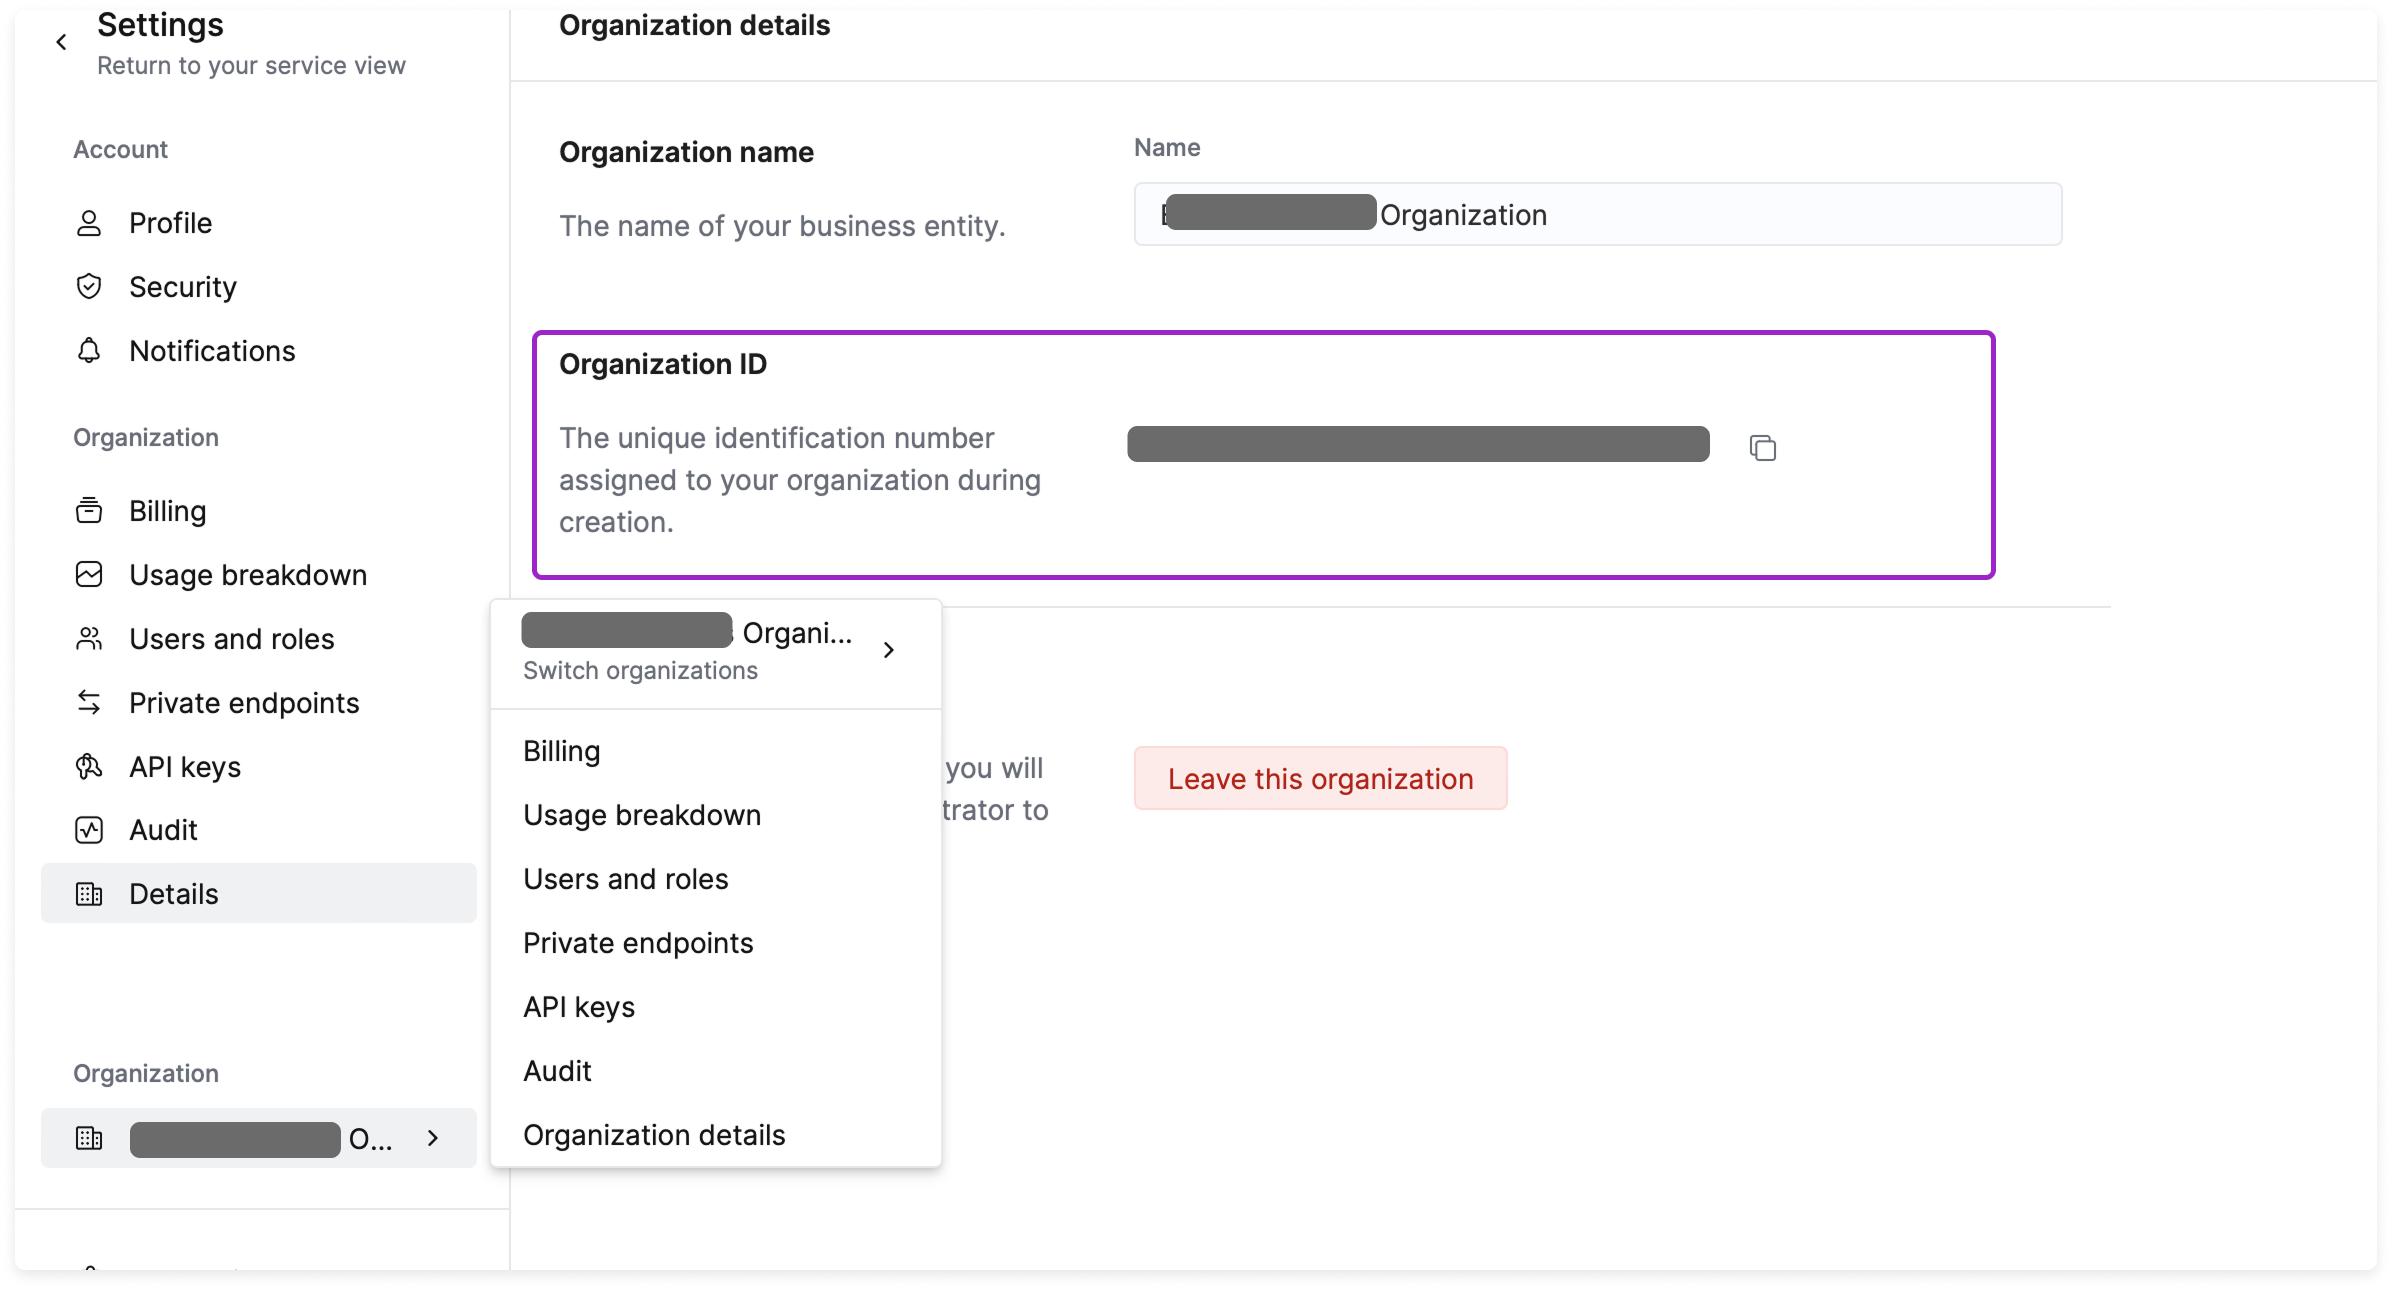
For **Organization ID**, add the ClickHouse Cloud Organization ID that was assigned to your organization during creation. To find this ID:
* From the **Settings** navigation menu, under **Organization**, select your organization and click **Organization details**.
* Copy the value displayed next to **Organization ID** and paste this in the Vantage integration form.
Click **Connect Account**.
After adding your integration, you will see the status of your integration change to **Importing** within the Vantage console. This status indicates that Vantage is actively importing your ClickHouse Cloud cost data. See the [Integration Status](/vantage_account#integration-status) documentation for details on integration statuses.
As soon as costs are processed, they will be available on your All Resources Cost Report. If you decide to remove your ClickHouse Cloud integration from Vantage, all costs associated with your ClickHouse Cloud API key will be removed from the Vantage console.
### Next Steps - Manage Workspace Access
Once the import is complete and the integration status changes to **Stable**, you can select which workspaces this integration is associated with. See the [Workspaces](/workspaces#manage-workspace-provider-integrations) documentation for information.
## Data Refresh
See the [provider data refresh documentation](/provider_data_refresh) for information on when data for each provider refreshes in Vantage.
## Active Resources
ClickHouse Cloud services are synced as active resources and available in [resource reports](/active_resources).
## ClickHouse Cloud Reporting Dimensions
On ClickHouse Cloud [Cost Reports](/cost_reports), you can filter across several dimensions:
* Organization (i.e., billing account)
* Service (e.g., ClickHouse Cloud)
* Category (e.g., datawarehouse or service)
* Subcategory (e.g., specific usage category, like `interRegionTier1DataTransferCHC` or `publicDataTransferCHC`)
* Resource (specific ID for a given ClickHouse cluster)
* Tags: Includes [Virtual Tags](/tagging) created in Vantage for this provider. The following provider tag is automatically created by Vantage from ClickHouse data and is available for filtering and grouping:
* `clickhouse:entityName`: The entity name associated with the cost, allowing you to filter and group costs by entity name.
* Charge Type (e.g., usage)
You can also view credits or discounts for ClickHouse Cloud costs in Cost Reports.
1. At the top of any ClickHouse Cloud Cost Report, click **Settings**.
2. Then, toggle on/off **Credits** and/or **Discounts**.